Quick Business Manager User Guide
Manage your business quickly and effectively with Quick Business Manager®.
Quick Business Manager is a comprehensive financial, analytics, and business management system.
The key benefits of Quick Business Manager are:
System Requirements
·
Processor
PC with 600 megahertz (MHz) Pentium processor
·
Hard
Disk Space
400 MB free.
·
RAM
256 megabytes (MB)
·
Video
800 x 600, 256 colors
·
Network
Card
32-bit 10/100 Mbps Ethernet. (If using a separate server)
·
Operating System
Windows .NET 2003 SP 1, Windows XP SP2, Windows Vista
Functionalities
Features
Installation
To install Quick Business Manager (QBM) on your computer just insert the Quick Business Manager CD in your CD-Rom drive. The CD is auto run and is supposed to run automatically. If it did not start, right click on the CD-Rom drive, click open, and then double click on the setup.exe file.
You can then choose from the options provided to install QBM:
Installing Quick Business Manager
If this is a single user edition, which means you want to install the QBM on a single computer, you only need to follow the setup wizard. If however, this installation is for multiple computers, you need to install the Server and/or Client application on the server computer and the client applications on all the other clients. Following the installation wizard will install the QBM on the specified path.
Running Quick Business Manager
You can run the QBM from Start->All Programs->Quick Business Manager or double clicking the program icon on your desktop.
After the program runs for the first time it asks for the product key. The product key consists of five parts, which are entered in the specified boxes. The product key can be found from the product package.
Single User Connection
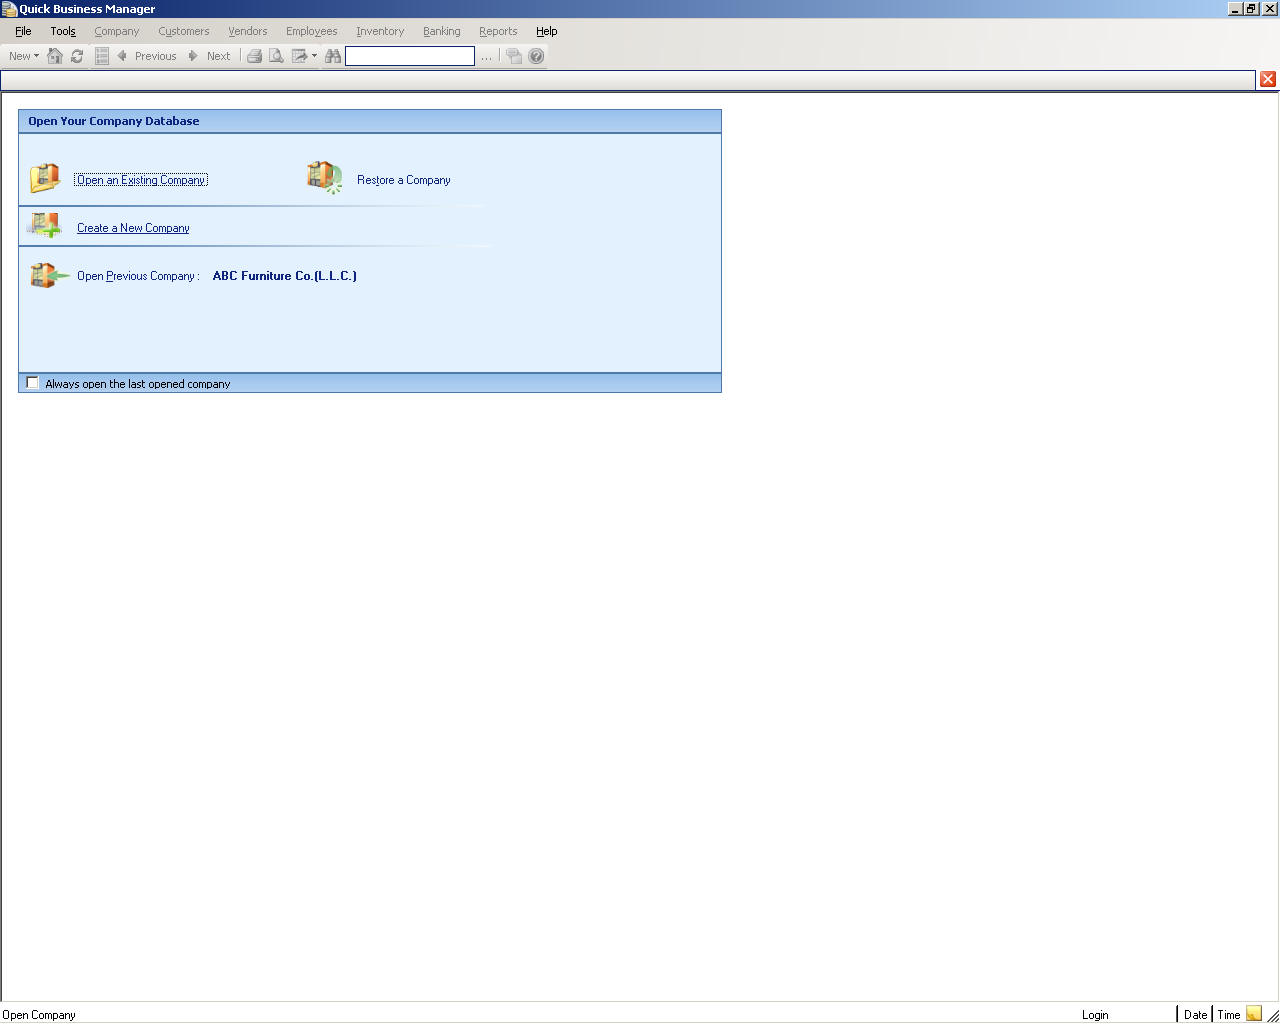
After running QBM you can either create a new company or open and existing company. If you would like to create a new company, please click “Creating a New Company” and see its section on this subject. If there is an existing company, please click “Open an Existing Company” and see its section on the subject.
Multi-User Connection
· Client Connection
1. To open a company, please see opening an existing company.
· Server Connection
1. To open a company, please see opening an existing company.
2. To create a new company, please creating a new company.
Business Processes
Business Process is a group of business activities undertaken by an organization in pursuit of a common goal. A business process usually depends upon several business functions for support, for example, IT, personnel, or accommodation. A business process rarely operates in isolation, for example, other business processes will depend on it and it will depend on other processes.
A typical business process involves purchasing, inventory, sales, accounting, and reports. Quick Business Manager automates these processes based on real life business scenarios. In Quick Business Manager, all the processes are integrated and executed in real time bases, so it ensures availability of real time information.
Quick Business Manager helps you track investments, purchases, expenses, sales, and other income. By entering transactions to track business activity, you can use the software to generate reports that indicate whether the business is making money or losing money. If your business’s revenue is greater than its expenses, the business has earned a profit and increased the equity of the owners. Management then can decide how and when to reinvest in the business. The business cycle starts again.
For example, a computer shop has the following business processes:
· Invest in business to secure cash to increase the cash for purchases.
· Purchase parts from vendors, which involves procurement of components needed to assemble a computer system.
· Manage Inventory, use inventory function to keep track of components.
· Pay vendors, use pay bills to pay the outstanding bills.
· Assemble components to create the finished item.
· Sell the components, assembled item, or services to customers.
· Receive payments from customers
· Use journal entries to make accounting adjustments
· View Reports to know more about the company, customers, and vendors.
Configuration Settings
There must be correct settings for the connection to work. To modify the setting please go to File->Data Utilities->Settings. In this dialog you can change the SQL Server Instance Name. QBM uses a default instance name, which is SQLExpress, to connect to SQL Server. However you can change this instance name to different instance name.
If it is a Client-Server application, the server name must also be specified. The server is the name or IP address of the computer that is running Quick Business Manager Server.
Navigating Around
You can always press F1 to display instant help about the active screen.
Each Center makes it easy to quickly find the information you are looking for:
Main Menu Bar
The main menu bar appears near the top of the screen.
The table below summarizes the menus in Main Menu bar
|
Menu Name |
Descriptions |
|
File |
File menu lets you open company, create new company, backup, restore, and other related tasks |
|
Tools |
Tools menu has commands for general tasks, such as Finding any transaction, upgrading database, other maintenance tasks, calculator and other utilities |
|
Company |
Contains tasks related to your company, such as company information, user tasks to manage users, and other general information such as currency list, shipper list, and unit of measures. |
|
Customers |
All related tasks for your customers are in this menu, such as creating invoices, orders, quotes, and other documents for your customer. |
|
Vendors |
Vendors menu contains tasks to help you enter vendor record, create bills, create orders, and all other tasks for your vendors. |
| Employees | Manage your employees from this menu. For example you can view employee list or pay employees from this menu. |
|
Inventory |
Lets you enter item records, transfer items between warehouses, adjust inventory, and other related tasks. |
|
Banking |
Lets you enter accounting records and bank tasks such as deposit, withdraw, transfer, and reconcile bank accounts. |
|
Reports |
Lets you view reports to print, or export. |
|
Help |
Help contents, and support windows. |
To navigate to a menu in the Main Menu bar, press ALT and the first letter of the menu name. For example to open File menu, press ALT + F.
You can always press F1 to display instant help about the active screen.
Window Navigation Keyboard
Use these keyboard shortcuts to navigate quickly in the program.
|
Navigation |
Keyboard Shortcut |
|
Move to next field |
TAB |
|
Move to previous field |
SHIFT + TAB |
|
Select default button, such as accept changes if the default button accepts changes |
ENTER |
|
Open company |
CTRL + O |
|
Find transactions |
CTRL + F |
|
Calculator |
CTRL + K |
|
Company information |
CTRL + SHIFT + F |
|
Create invoices |
CTRL + I |
|
Receive payments |
CTRL + R |
|
Create sales receipt: for point of sale (POS) |
CTRL + SHIFT + P |
|
Customer list |
CTRL + SHIFT + U |
|
Vendor list |
CTRL + SHIFT + V |
|
Make journal entry |
CTRL + J |
|
Help about current window |
F1 |
|
Exit the program |
ALT+F4 |
Record Detail
Record Detail displays information about the record in the list. For example, a customer record displays information about the customer in the customer list. To view records details double click the record in the list to view the Detail.
To create a new record in the list, select new record. For example, to create a new customer in the list, click New Customer.
Creating a New Company
To create a new company please click “Create a New Company” link or use File->New Company menu. Then a dialog will appear and lets you create the company with easy steps.
Notes for creating a new company:
In the dialog provided please enter the required fields. The required fields are the name of your company, and the first month of your fiscal year.
Opening an Existing Company
If you already have created a company or there is an existing company click “Open an Existing Company” link or use File->Open Company menu. Then in the dialog type the name of an existing database or click Browse to select an existing database. Type the user ID and password and press OK button.
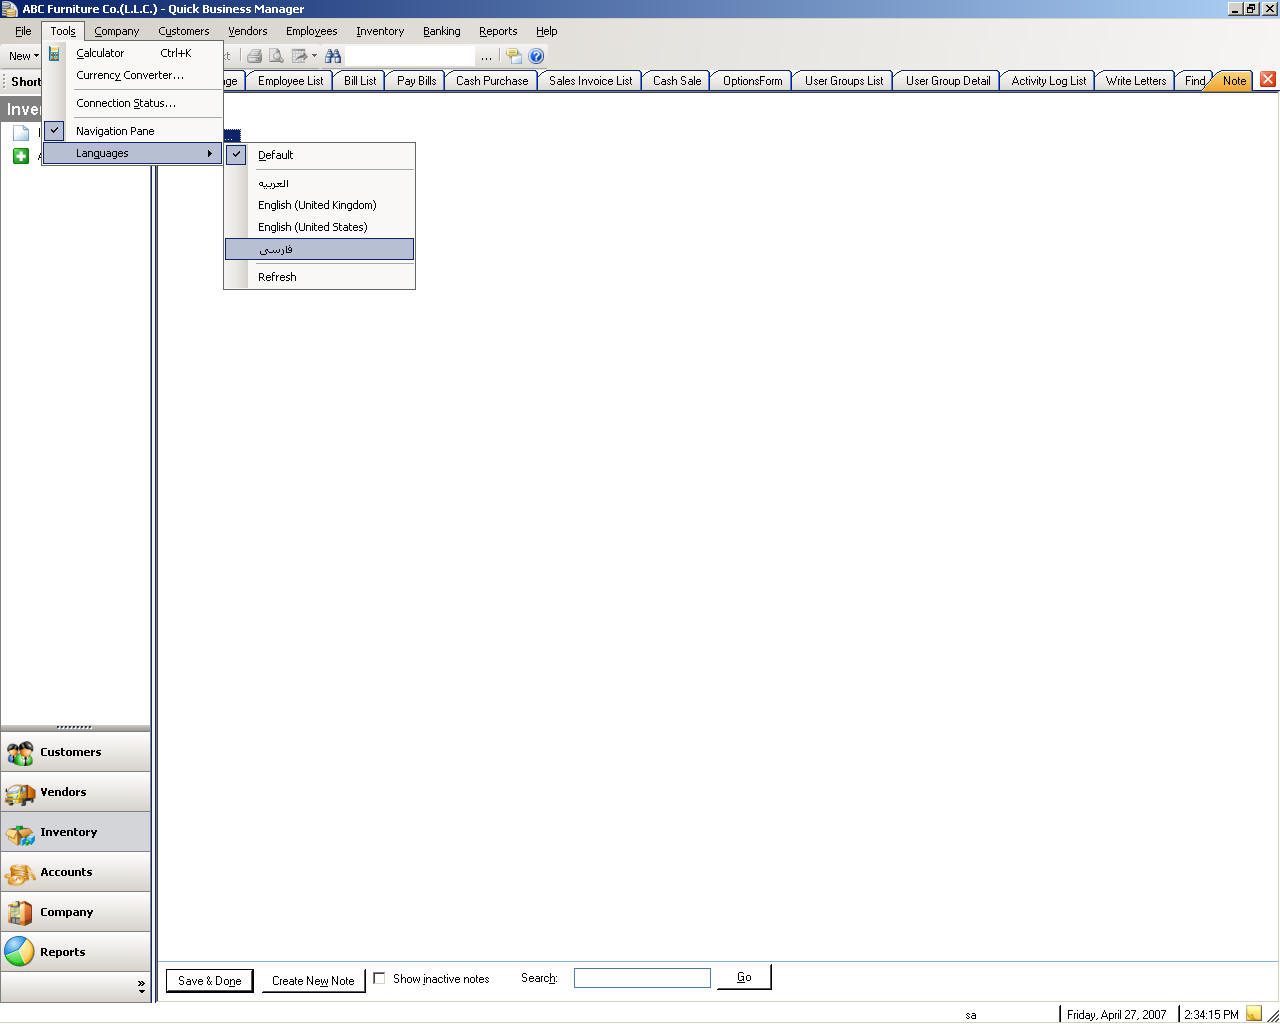
Changing Languages
Please use Tools->Languages to change the language.
To create or edit a language, please go to the program run directory, for example C:\Program Files\Business Aim\QBM and then open the Languages directory. You can delete a certain language if you do not want it to be shown.
Company
Any business or for-profit economic activity may be referred to as a company.
Company Information
To edit company information, please go to Company->Company Information.
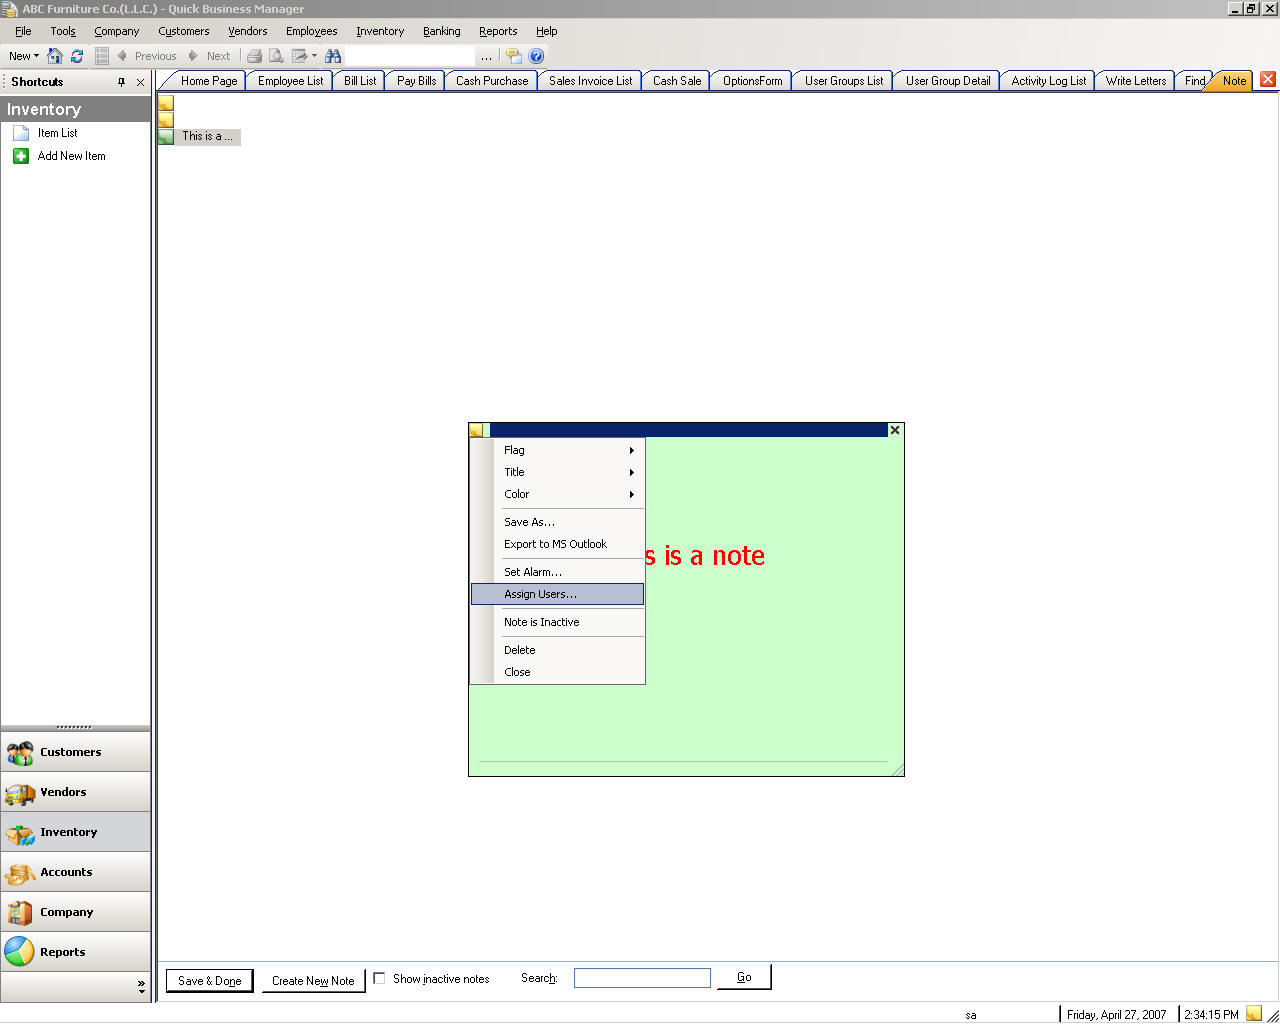
Creating Notes
To create, edit, or view notes, please go to the Company menu, and then select Create/View Notes, or Company-> Create/View Notes.
Closing Financial Date
Unlike many accounting software, Quick Business Manager does not close your company fiscal year.
There are advantages to not closing the fiscal periods such as:
To close financial date, please go to the Company menu, and then select Set Closing Date. Please note that the user must have the right to see this submenu.
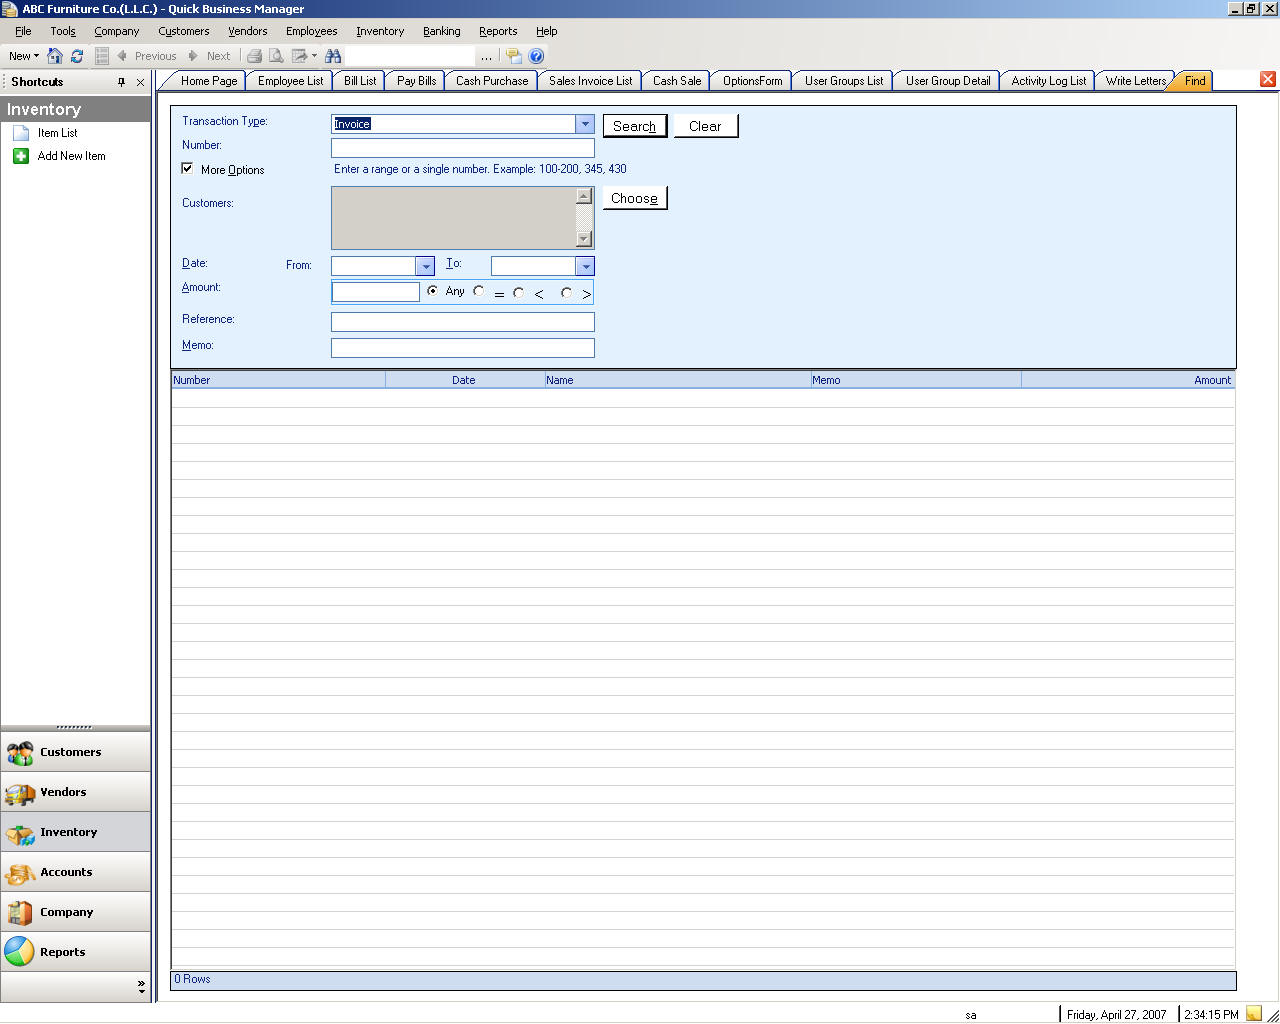
Finding Transactions
To find a transaction such as invoice or bill, please select the Company menu, and then Find Transactions.
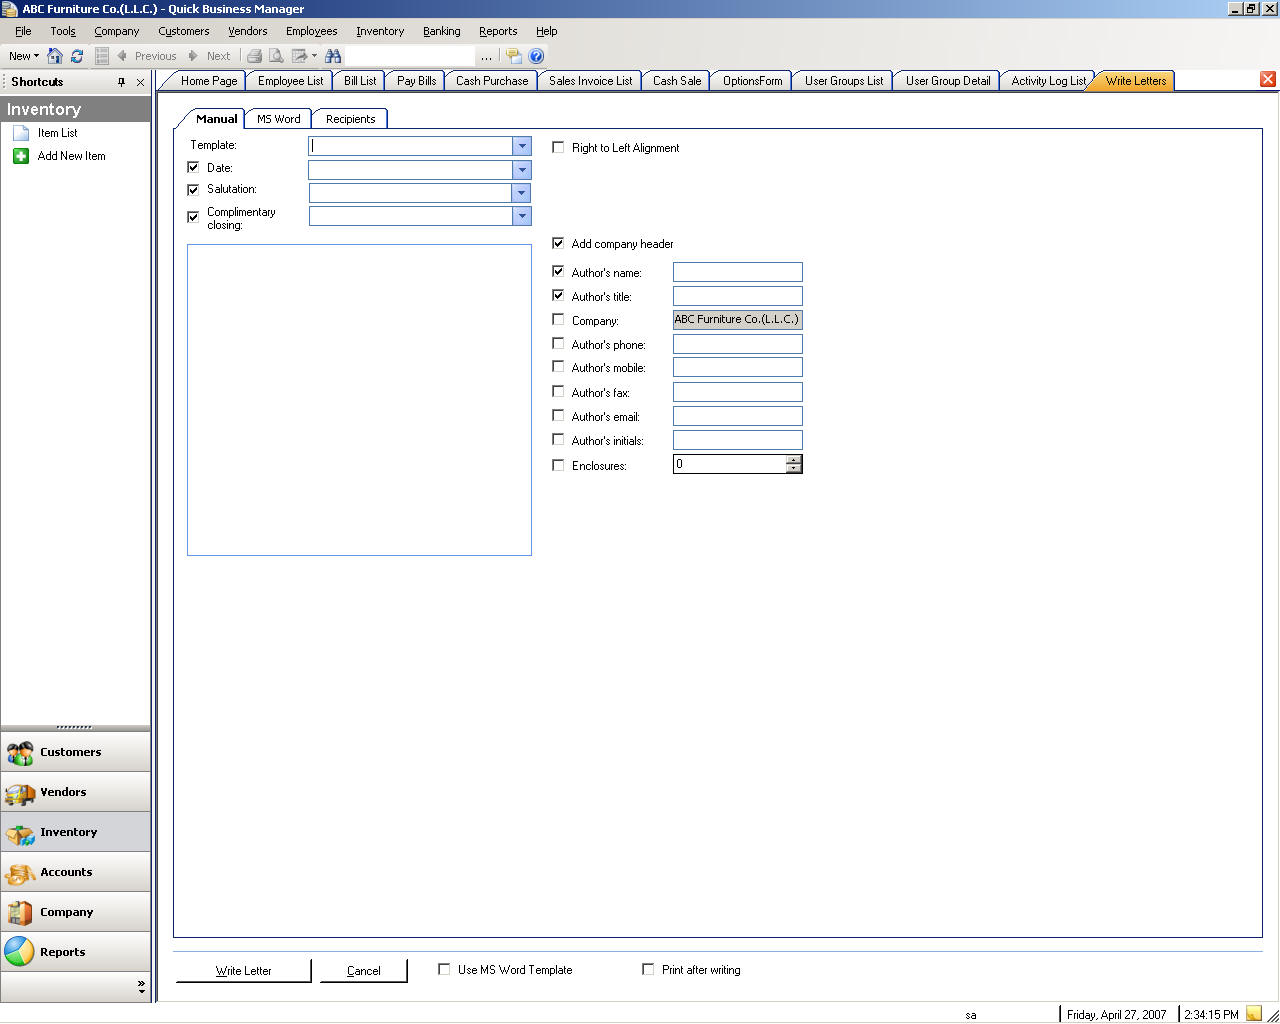
Writing Letters
To write letters, please go to the Company menu, and then select Write Letters.
Sending E-Mail
To send e-mail, please go to the Company menu, and then select Send Email.
Reminders
You can view system reminders by going to the Company menu, and then selecting Reminders.
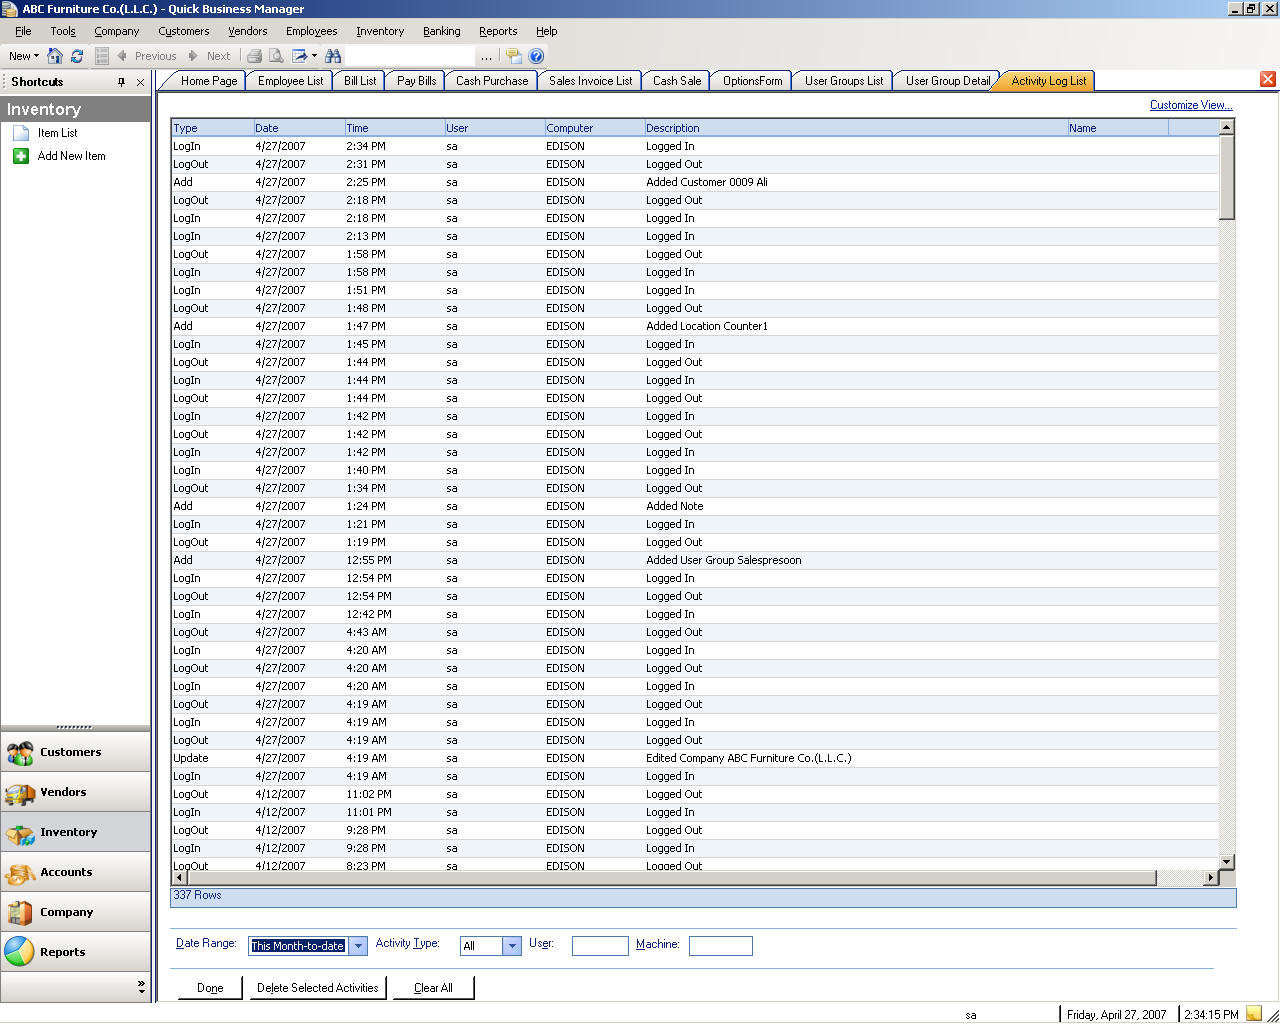
Activity Logs
All users’ actions or activities are recorded. You can view this list by going to the Company menu, and then selecting Activity Logs.
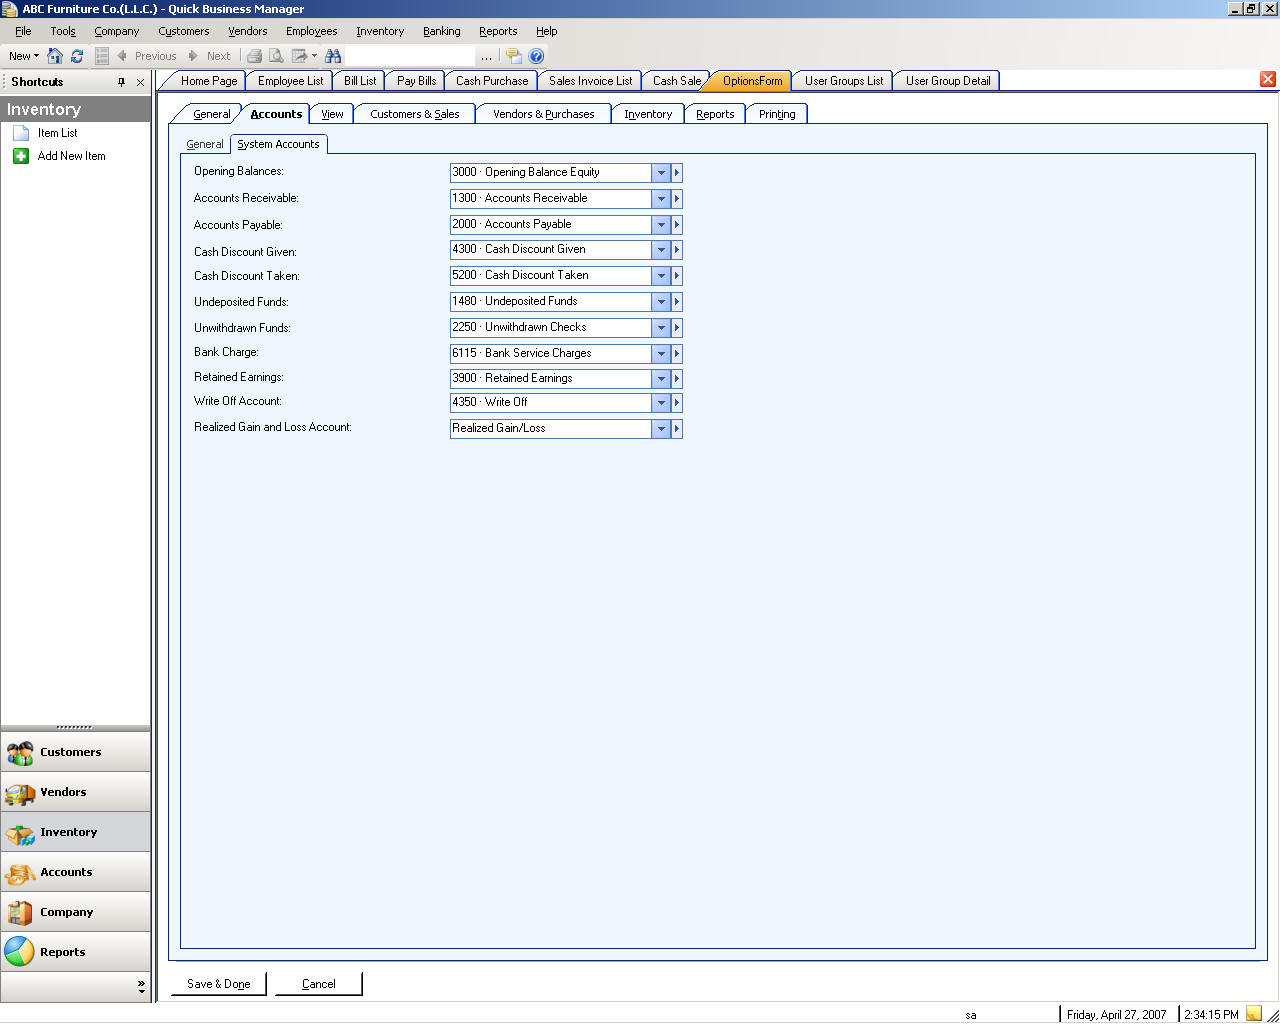
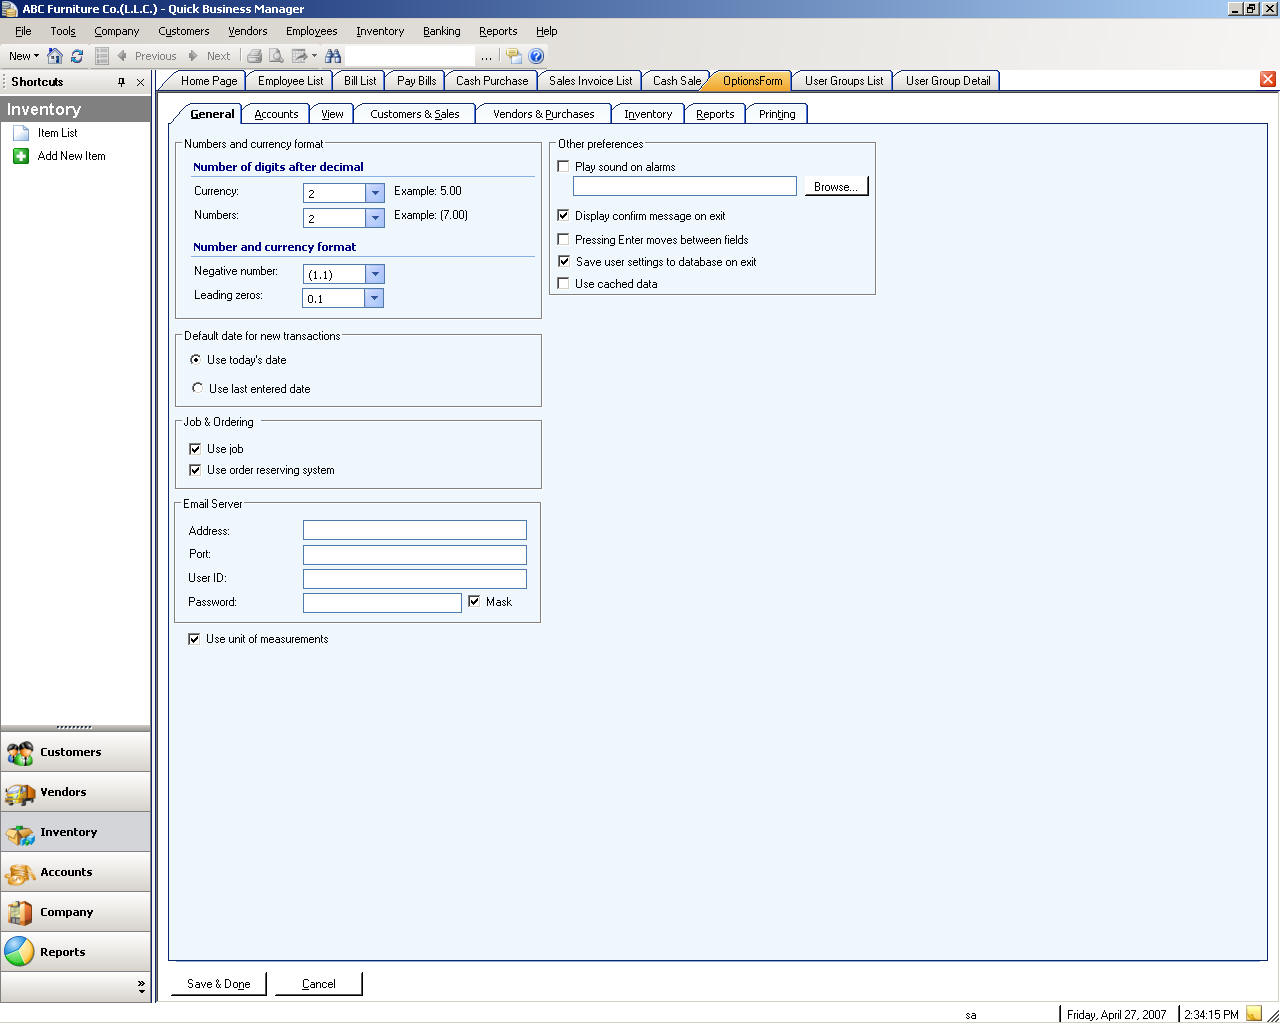
Options
You can change global or user’s settings by going to the Company menu, and then selecting Options.
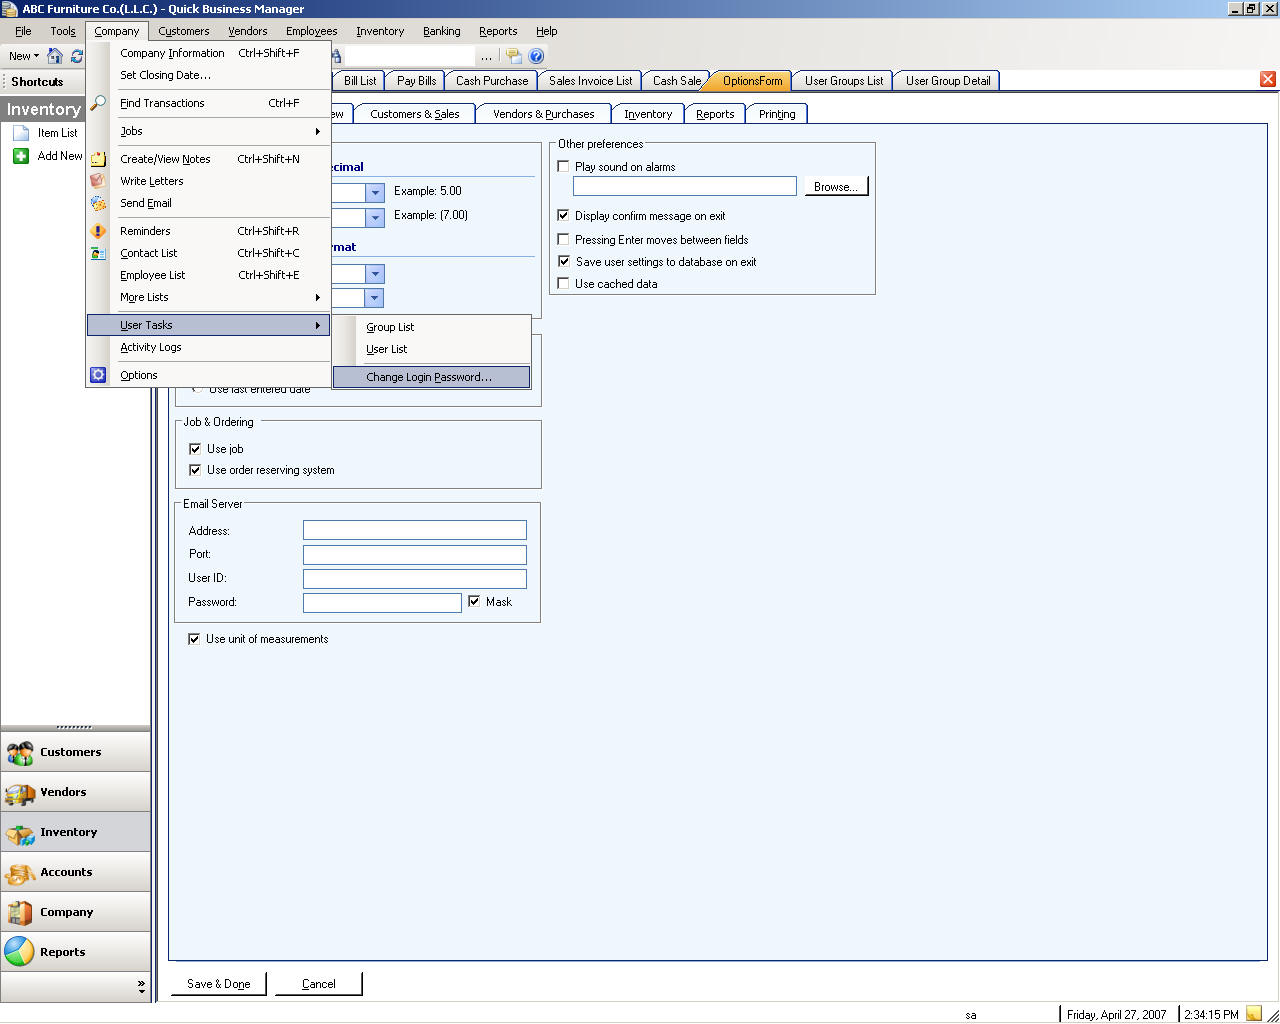
Changing Login Password
You can change the login password by going to Company->User Tasks->Change Login Password.
Lists
A list can consist of any activities that the user performs. In the list the user can create, edit, or delete the content of the list. For example if the user creates a new customer, the created customer is found in the Customer List where it can be edited or deleted. A new customer is created from the Customer List. Some of lists are explained below.
Job/Project List
To create, edit, or delete jobs or projects, please go to Company->Jobs->Job List.
Job Type List
To create, edit, or delete jobs, please go to Company->Jobs->Job Type List.
Enabling Jobs/Projects
To enable and work with jobs pleas go to the options in Company menu.
Terms List
To create, edit, or delete terms of payment, please go to Company->More Lists->Terms.
Credit Card List
To create, edit, or delete credit cards, please go to Company->More Lists->Credit Cards.
Payment Method List
To create, edit, or delete payment methods, please go to Company->More Lists->Payment Methods.
Currency list
To create, edit, or delete currencies, please go to Company->More Lists->Currencies.
Location List
To create, edit, or delete locations, please go to Company->More Lists->Location.
Letter Template List
To create, edit, or delete letter templates, please go to Company->More Lists->Letter Templates.
Unit of Measure List
To create, edit, or delete the unit measures, please go to Company->More Lists->Unit of Measures.
Shipper List
To create, edit, or delete the shippers, please go to Company->More Lists->Shippers.
Print Template List
To create, edit, or delete the print templates, please go to Company->More Lists->Printer Templates.
User List
This is a list of users who can access the software, given their permission to perform certain tasks. The permission of the user is set from the group, which means the user is assigned to certain groups.
To create, edit, or delete the user, please go to Company->User Tasks->User List.
Group List
A group determines the permission of the login user. For example, if you want certain login or user to be able to perform certain tasks and not to be able to perform other tasks, create the group and set its permission. Then assign the group to the user or login by going to that user.
To create, edit, or delete the groups, please go to Company->User Tasks->Group List.
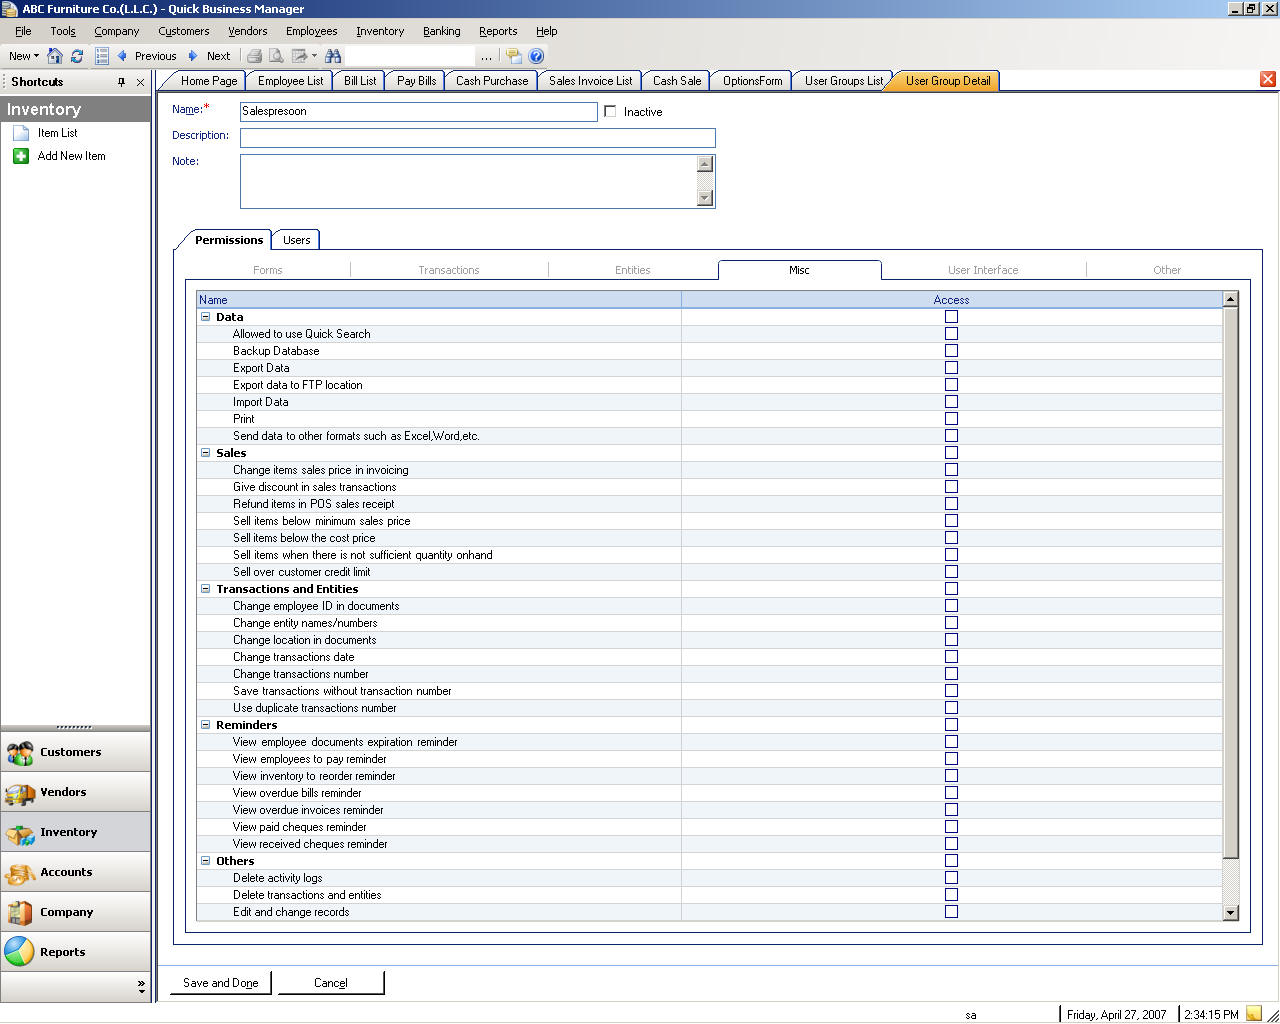
Security
You can define security for each group, and then add the group to the user. To do this, please create a group and the go to that group details and define its security. To define the security for the group select each area you want to define its security. After the security is defined, go the user detail and add that created group to the specified user.
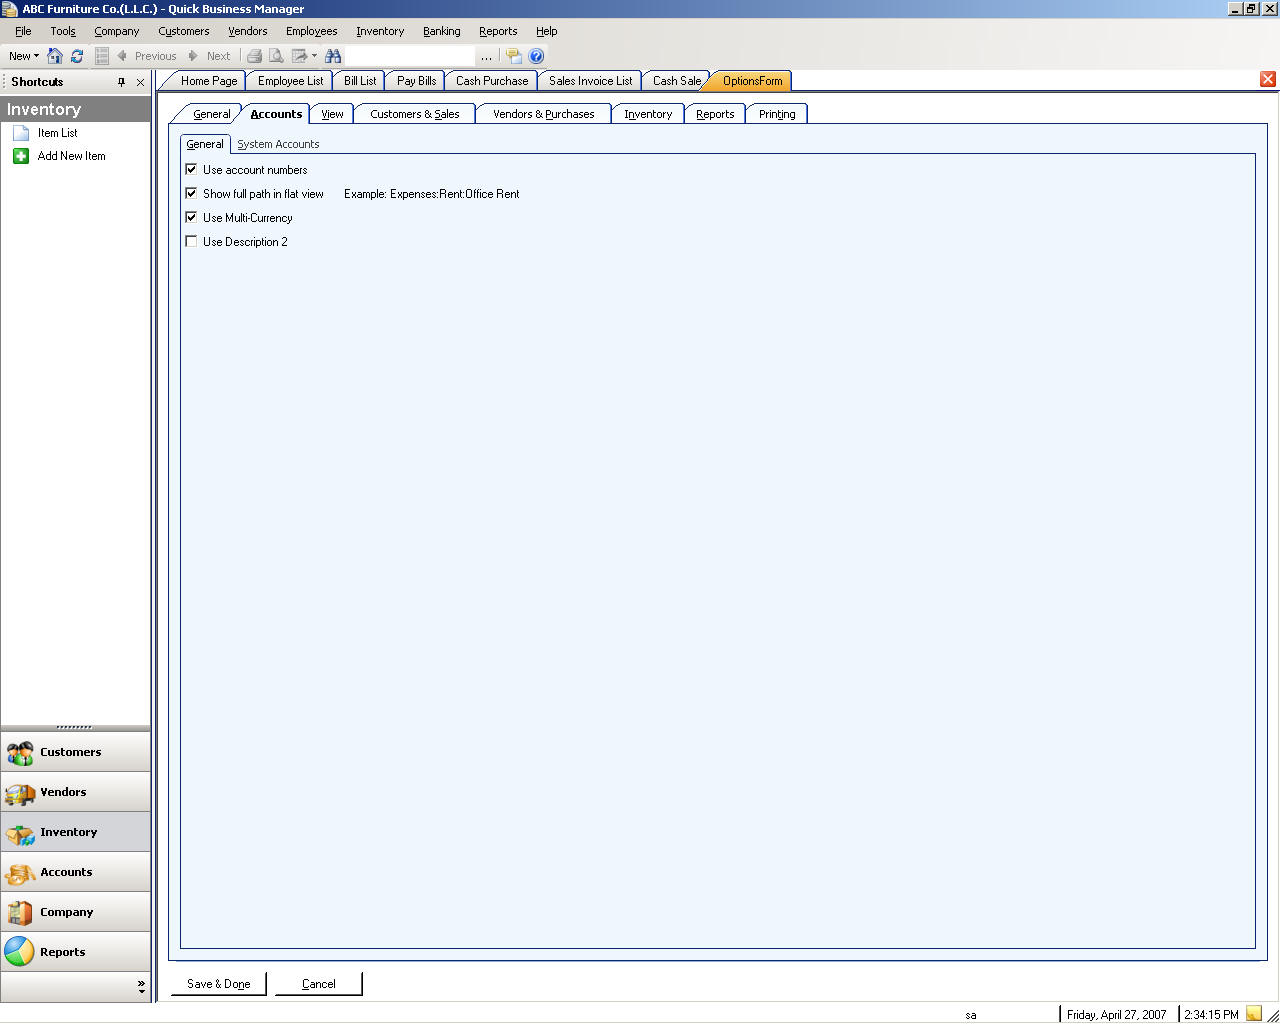
Multi-Currency
You can work with different currencies in an transaction. To enable multi-currency, please go to the options from Company menu and the select Use Multi-Currency.
Contact List
To create, edit, or delete the contact, please go to the Company menu, and then select contact list.
Customers
A customer is someone or a company who makes use of or receives the products or services of an individual or organization.
Customer List
You can view, edit, or create a new customer by going to the customer list. To go to the customer list, please select Customers menu, and then select Customer List.
Sales Documents
Sales documents include the following documents, which are entered with line items:
· Sales Invoices
· Sales Receipts
· Sales Orders
· Sales Quotes
Entering customer, item and other information in Sales Document is quick and easy. For example, if the customer does not exist, you can use quick setup to quickly add the customer. A quick setup is activated when you type non-existing customer name in the customer list.
Sales documents can be exported to Microsoft® Excel or saved as different file format.
Create Invoices
Sales invoices are legally binding documents that you create if the customer does not pay the full amount at the time you sell your products or services. A sales document is posted in real time when you save the invoice. Sales invoices increase the customer balance and decrease the inventory quantities.
To create a sales invoice
| If you want to | Do this |
| Select the particular Sales Order | click Select SO button |
| Edit an item | double click the item, then edit the item and press enter to save that item in the list |
| Delete an item | select the item and click Delete button |
| Add discount for the bill | enter the amount in the Discount field |
| Void sales invoice | Right click sales invoice and select Void Invoice |
Create Cash Invoices
To create cash invoices for the customer, please go to the Customers menu, and then select Create Cash Invoices.
Create Quotations
Sales quotes are valuable sales tools because customers or prospects might request estimates or quote for items cost before they make purchase decision.
Similar to Sales orders, Sales quote are saved but not posted. If a customer decides to make a purchase based on the quoted price you have provided, you can create a sales invoice from the sales quote and information about the document, customer, and item will be transferred to the new document.
Create Orders
Sales orders let you enter items for customers that are agreed upon and later can be exchanged. Later, you can invoice and ship the items as they become available in your inventory, tracking the backorders in the system. Sales orders are saved, but not posted. When you deliver the goods or services, you can transfer the order information to create an invoice from the order.
To create a sales order
You can create an invoice from the orders. Please see creating invoices.
Create Delivery Notes
Delivery note is a document, issued by the suppliers, which accompanies a delivery of goods, specifying their type and quantity.
To create delivery notes for the customer, please go to the Customers menu, and then select Create Delivery Notes.
Create Credit Memos or Refunds
You create credit memos when the customer returns the products or services and you want to pay by credit.
To create credit memos or refunds for the customer, please go to the Customers menu, and then select Create Credit Memos/Refunds.
Create Cash Refunds
You create cash refund when the customer returns the products or services and you want to pay by cash.
To create cash refunds for the customer, please go to the Customers menu, and then select Create Cash Refunds.
Create Statements
You use Customer Statement to view and print the customer statement. Statements show current customer activity, aging period balance information, the total amount due, and payments received.
To view Customer Statement:
If you want to view the aging by month, check the ‘view aging by month’ option. This option views the aging summary by month.
You can view the unposted cheques that received from customers by checking the ‘view unposted cheques’ option.
Sales Returns
A credit memo tells your customer that you have reduced the balance (for example, when a customer cancels a sale, returns something, or overpays). Enter credit memos in the Create Credit Memos/Refunds screen.
You can use credit memo to bring items that you previously sold back into your inventory. Returns decrease the customer balance and will increase inventory quantities. Return is posted in real time.
Use the Create Credit Memos/Refunds to record a return when a customer returns items for which you have already recorded an invoice. Creating the refunds increases the inventory items and decreases the Account Receivable.
To create a credit memo/refund
Use the Create Credit Memos/Refunds to record a return when a customer returns items for which you have already recorded an invoice. Creating the refunds increases the inventory items and decreases the Account Receivable.
If you simply want to pay your customer an amount without receiving items, use Make Withdrawal from the Banking menu and select Accounts Receivable and the Customer.
Receive Payments
Receive Payment screen is for recording the payment you receive from your customers. This screen lets you record the payment against the unpaid invoices.
To enter a payment for a customer's unpaid invoices, you must select the customer and the accounts receivable.
After selecting the customer and the accounts receivable, all the open invoices are displayed in the list. The amount due column shows the invoice balance. Column Credits shows the customer's credits you have applied using the Set Credits button. To apply the credits, click Set Credits button. The Payment column shows the amount you have applied to the invoice.
You need to specify the bank account into which the money is deposited. You also need to specify the payment methods. If the payment method is cheque, you must enter the cheques number and the cheque date.
If you do not want the payment to be reflected in your general ledger and bank account, uncheck ‘Post this transaction’ option. If you check Post this transaction option the transaction will create records in general ledger, update your bank account, accounts receivable, and the customer balance. However if you uncheck the option only the Customer balance is updated. This option is useful if the customer pays you a post-dated cheque (PDC). There will be a reminder to remind you when the post-dated cheque is due to be deposited.
Delivery Note/Packing list
Lists and filters the delivery notes.
| If you want to | Do this |
| View detail | Select an item from the list and either double click that bill or click Go to Delivery Note |
| Create a new delivery note | Click on New Delivery Note button |
| Filter delivery note by a specific customer | Select a customer from Customer list located in the list |
| Filter by Dates | Select the specified date from Dates list |
| Custom Date: enter date yourself | Select Custom Dates from Dates list. Scroll the list down and select Custom Dates. |
Invoice List
To create, edit, or delete invoices, please go to Customers->Transaction List->Invoices.
Received Cheques List
Lists and filters the cheques received from your customer. The received cheques are payments using bank cheques. If you select the payment method as Cheque, in the Receive Payments, this transaction is recorded as a cheque transaction. A Cheque transaction has the cheque number and the cheque date, so you can tell which cheque must be deposited by its date.
Note that you can mark the cheque transaction and change its status. To change the status of the cheque, right click the item and select Mark As. For example, if the customer's cheque was returned from the bank, for an insufficient fund, you can mark the cheque as Bounced. Please see Transaction Status for details about the transaction status.
| If you want to | Do this |
| View transaction detail | Select a transaction from the list and either double click that item or click Go to Transaction |
| Filter transactions by a specific customer | Select a customer from Customer list located in the list |
| Filter by Dates | Select the specified date from Dates list |
| Custom Date: enter date yourself | Select Custom Dates from Dates list. Scroll the list down and select Custom Dates. |
| Mark the transaction | Right click on the transaction and select Mark As, and then select the appropriate status. |
Cash Sale List
To create, edit, or delete cash sales, please go to Customers->Transaction List->Cash Sales.
Credit Memo/Refund List
To create, edit, or delete credit memos/refunds, please go to Customers->Transaction List->Credit Memos/Refunds.
Cash Refund List
To create, edit, or delete cash refund, please go to Customers->Transaction List->Cash Refunds.
Quote List
To create, edit, or delete Quotes or Quotations, please go to Customers->Transaction List->Quotes.
Order List
Lists and filters the sales orders.
| If you want to | Do this |
| View order detail | Select a order from the list and either double click that bill or click Go to Order |
| Create a new order | Click on New Order button |
| Filter orders by a specific customer | Select a customer from Customer list located in the list |
| Filter by Dates | Select the specified date from Dates list |
| Custom Date: enter date yourself | Select Custom Dates from Dates list. Scroll the list down and select Custom Dates. |
Delivery Note List
To create, edit, or delete Delivery Notes, please go to Customers->Transaction List->Delivery Notes.
Customer Payment List
To create, edit, or delete customer payments, please go to Customers->Transaction List->Payments.
Vendors
A vendor is a supplier of goods or services, such as a printer or a service bureau.
Purchase Documents
Purchase documents include the following documents, which are entered with line items:
· Purchase Invoices/Receipts
· Purchase Orders
· Purchase Returns
Purchase documents can be exported to Microsoft® Excel or saved as different file format. You can export a purchase document to Excel® by clicking on Export to Excel link.
Vendor List
You can view, edit, or create a new vendor by going to the vendor list. To go to the vendor list, please select Vendors menu, and then select Vendor List.
Receiving Items and Entering Bills
You create purchase receipt or bill to record the purchase transactions from your vendor. You can enter an invoice receipt when you receive an invoice for a shipment receipt that was entered and posted earlier, or for a shipment that you have not yet received. You can also create purchase receipts from multiple purchases orders.
The Invoice Receipts window is designed to resemble a physical invoice document and includes vendor, line item, and invoice information.
To create a purchase receipt:
| If you want to | Do this |
| Select the particular purchase order | click Select PO button |
| Edit an item | double click the item, then edit the item and press enter to save that item in the list |
| Delete an item | select the item and click Delete button |
| Add freight for the bill | To enter the amount in the Freight field |
| Void purchase invoice | Right click purchase invoice and select Void |
Create Cash Purchases
To create cash purchase, please go to the Vendors menu, and then select Create Cash Purchase.

Create Quotes
To create quotes to the vendors, please go to the Vendors menu, and then select Create Quotes.
Create Orders
To create orders to the vendors, please go to the Vendors menu, and then select Create Orders.
Create Orders
To create orders to the vendors, please go to the Vendors menu, and then select Create Orders.
Create Credit Memos/Refunds
To create credit memos or refunds to the vendors, please go to the Vendors menu, and then select Create Credit memos/Refunds.
Create Cash Refunds
To create cash refund to the vendors, please go to the Vendors menu, and then select Create Cash Refunds.
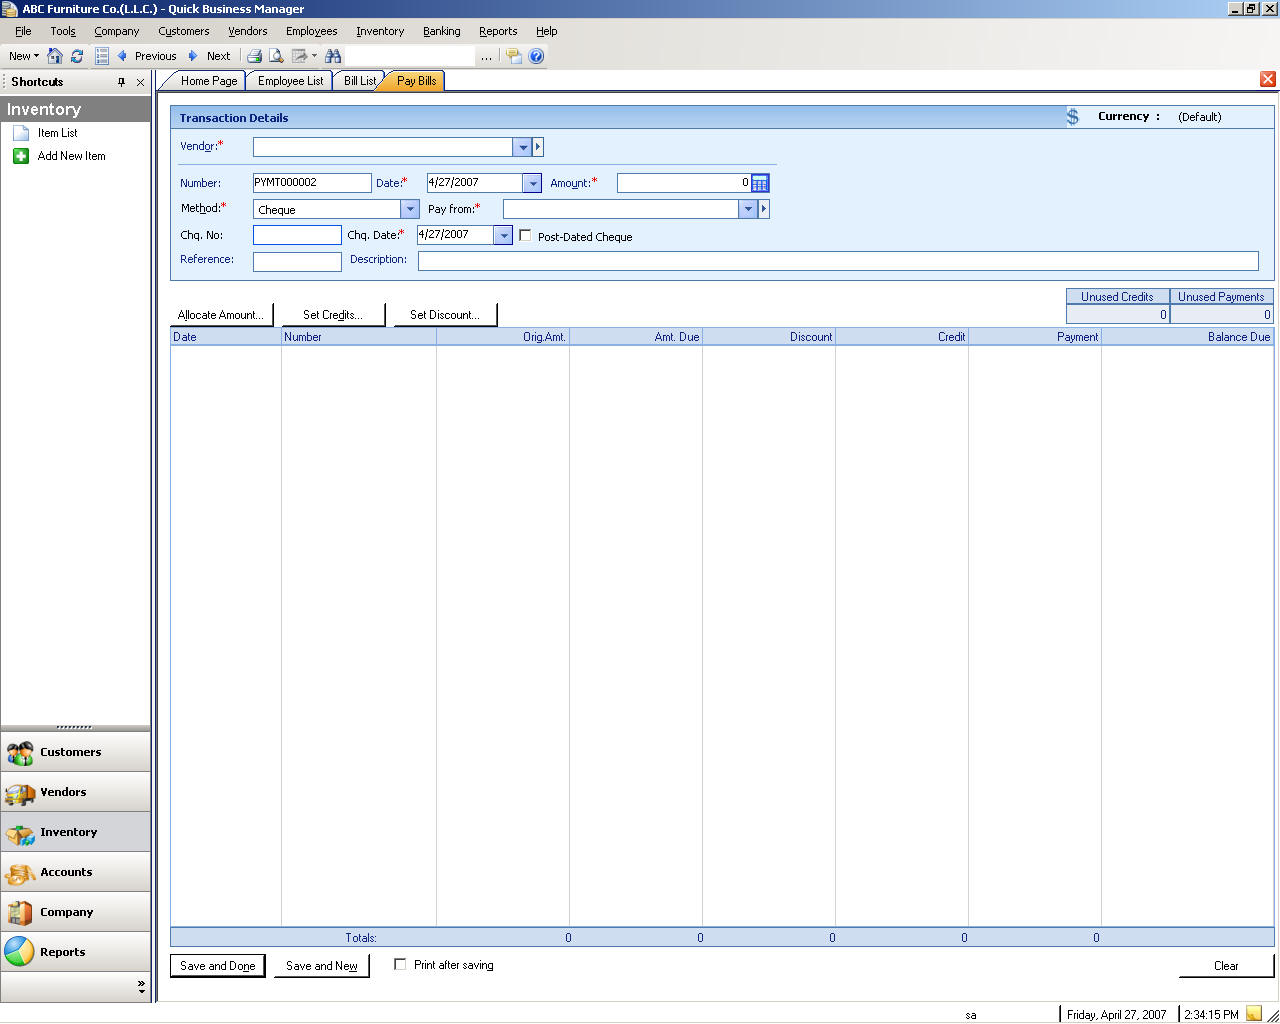
Pay Bills
To pay bills to the vendors, please go to the Vendors menu, and then select Pay Bills.
Create Proforma Invoices (for the Letter of Credits or LC)
To create proforma invoices, please go to the Vendors menu, select Letter of Credits, and then select Create Proforma Invoices.
Proforma Invoice List (for the Letter of Credits or LC)
To see the proforma invoice list, please go to the Vendors menu, select Letter of Credits, and then select Proforma Invoice List.
Letter of Credit List (for the Letter of Credits or LC)
To see the list of letter of credits, please go to the Vendors menu, select Letter of Credits, and then select Letter of Credit List.
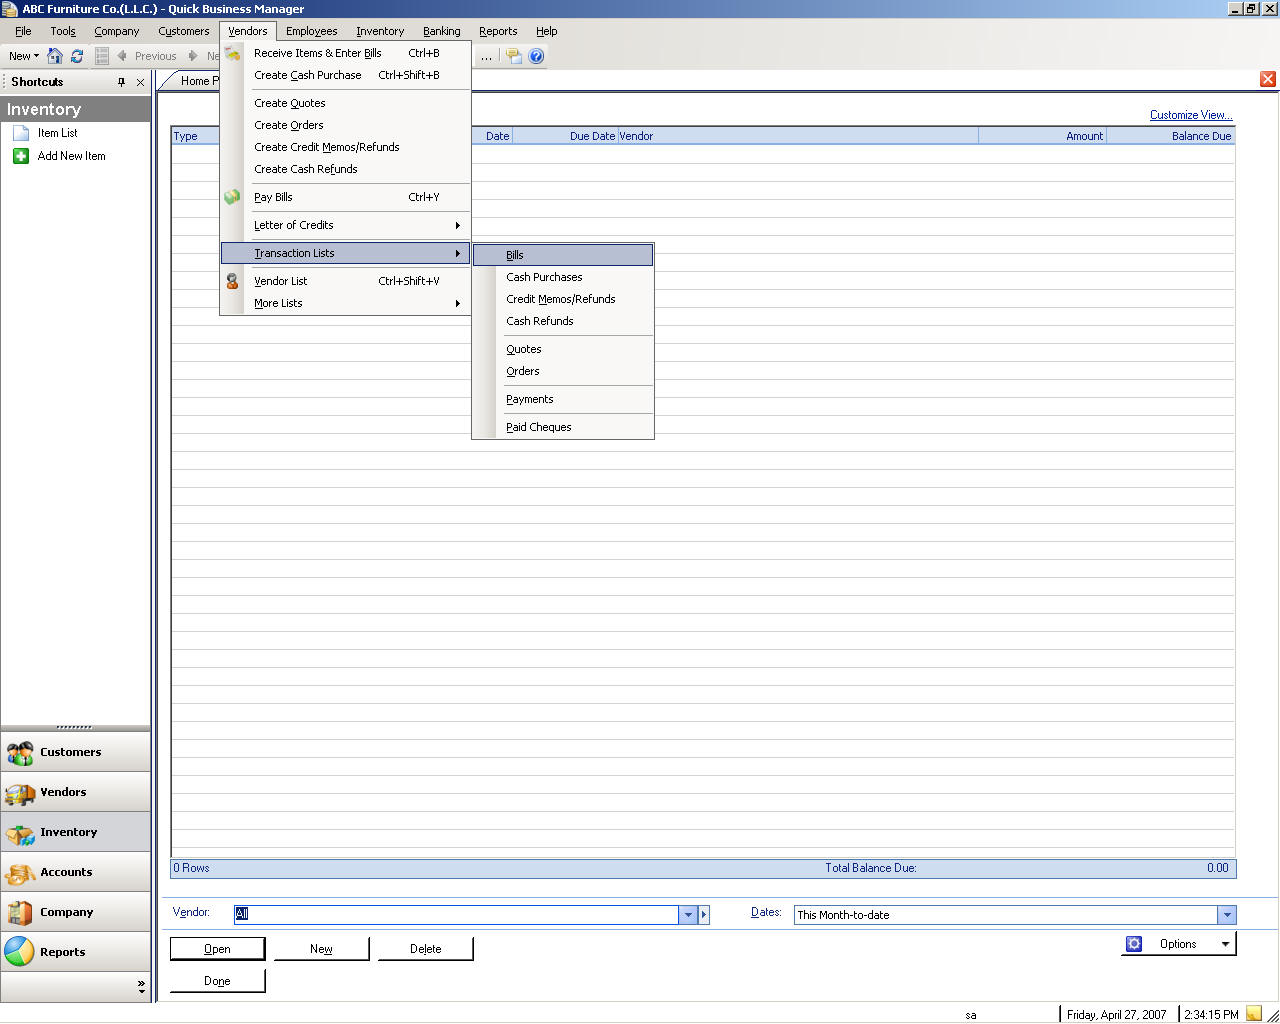
Bill List
To create, edit, or delete bills, please go to Vendors->Transaction List->Bills.
Cash Purchase List
To create, edit, or delete cash purchases, please go to Vendors->Transaction List->Cash Purchases.
Vendor Credit Memo or Refund List
To create, edit, or delete vendor credit memos or refunds, please go to Vendors->Transaction List->Credit Memos/Refunds.
Vendor Cash Refund List
To create, edit, or delete vendor cash refunds, please go to Vendors->Transaction List->Cash Refunds.
Vendor Quote List
To create, edit, or delete vendor quotes, please go to Vendors->Transaction List->Quotes.
Vendor Order List
To create, edit, or delete vendor orders, please go to Vendors->Transaction List->Quotes.
Vendor Payment List
To create, edit, or delete payments to the vendor, please go to Vendors->Transaction List->Payments.
Paid Cheque List
To view paid cheques, please go to Vendors->Transaction List->Paid Cheques.
Vendor Opening Balance
Vendor opening balances are the amounts that you owe vendors when you begin using Quick Business Manager. You change vendor opening balance from vendor detail.
Employees
An employee is a person who works for a public or private employer and receives remuneration in wages, salary, commission, tips, piece-rates or pay-in-kind.
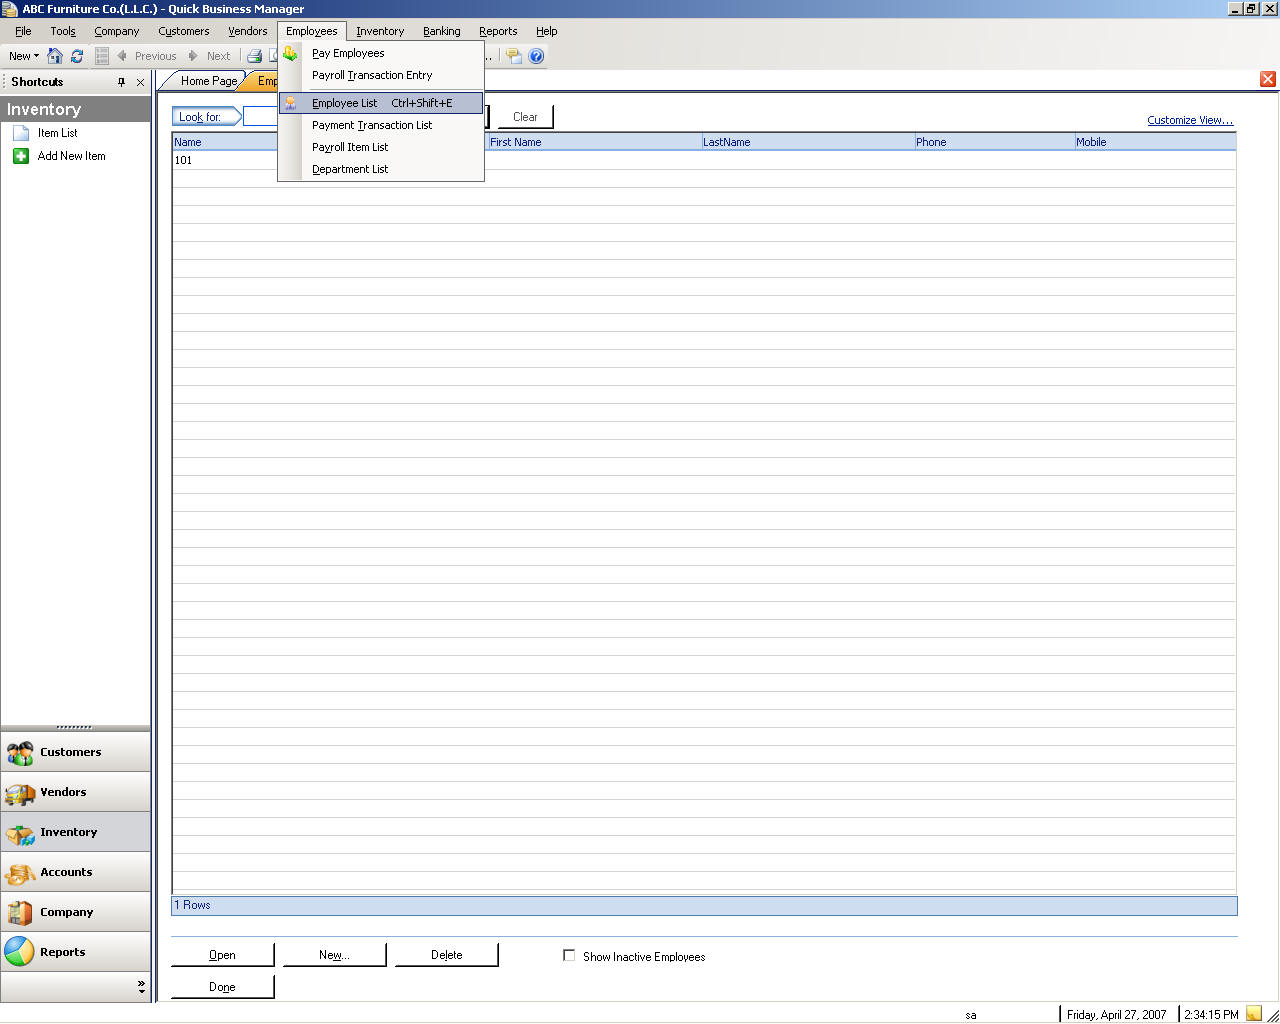
Employee List
You can view, edit, or create a new employee by going to the employee list. To go to the employee list, please select the Employees menu, and then select Employee List.
Paying a Single Employee
To pay an employee, please go to the Employees menu, and then select Pay Employees.
Paying Multiple Employees
To pay multiple employees, please go to the Employees menu, and then select Payroll Transaction Entry.
Payroll Transaction List
To create, edit, or delete a payroll entry, please go to the Employees menu, and then select Payment Transaction List.
Payroll Item List
To create, edit, or delete a payroll item, please go to the Employees menu, and then select Payroll Item List.
Department List
To create, edit, or delete a department, please go to the Employees menu, and then select Department List.
Inventory
The inventory is the company's merchandise, raw materials, and finished and unfinished products which have not yet been sold, or are held available in stock
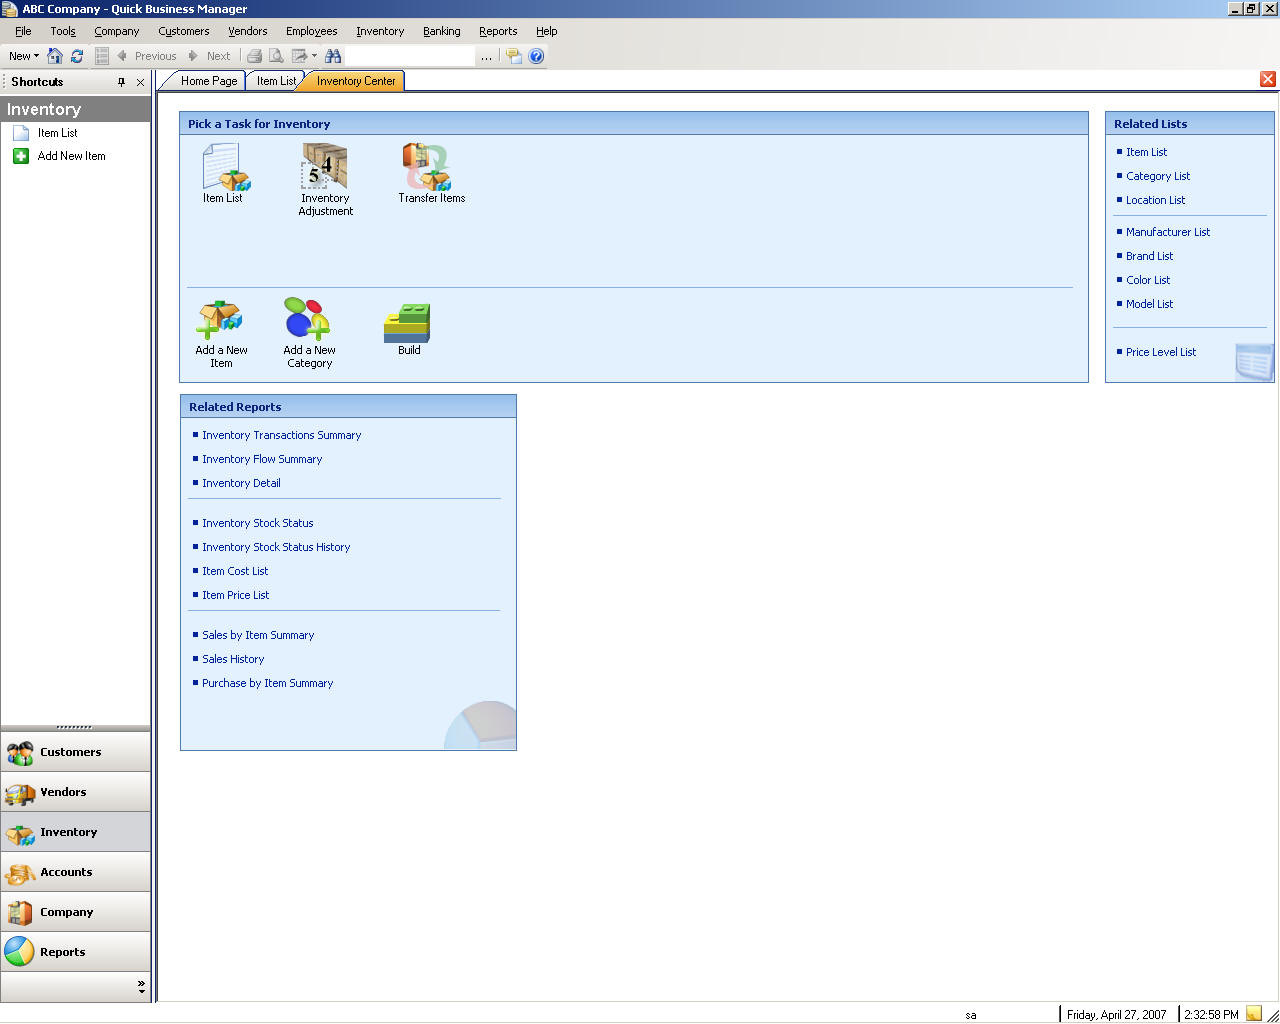
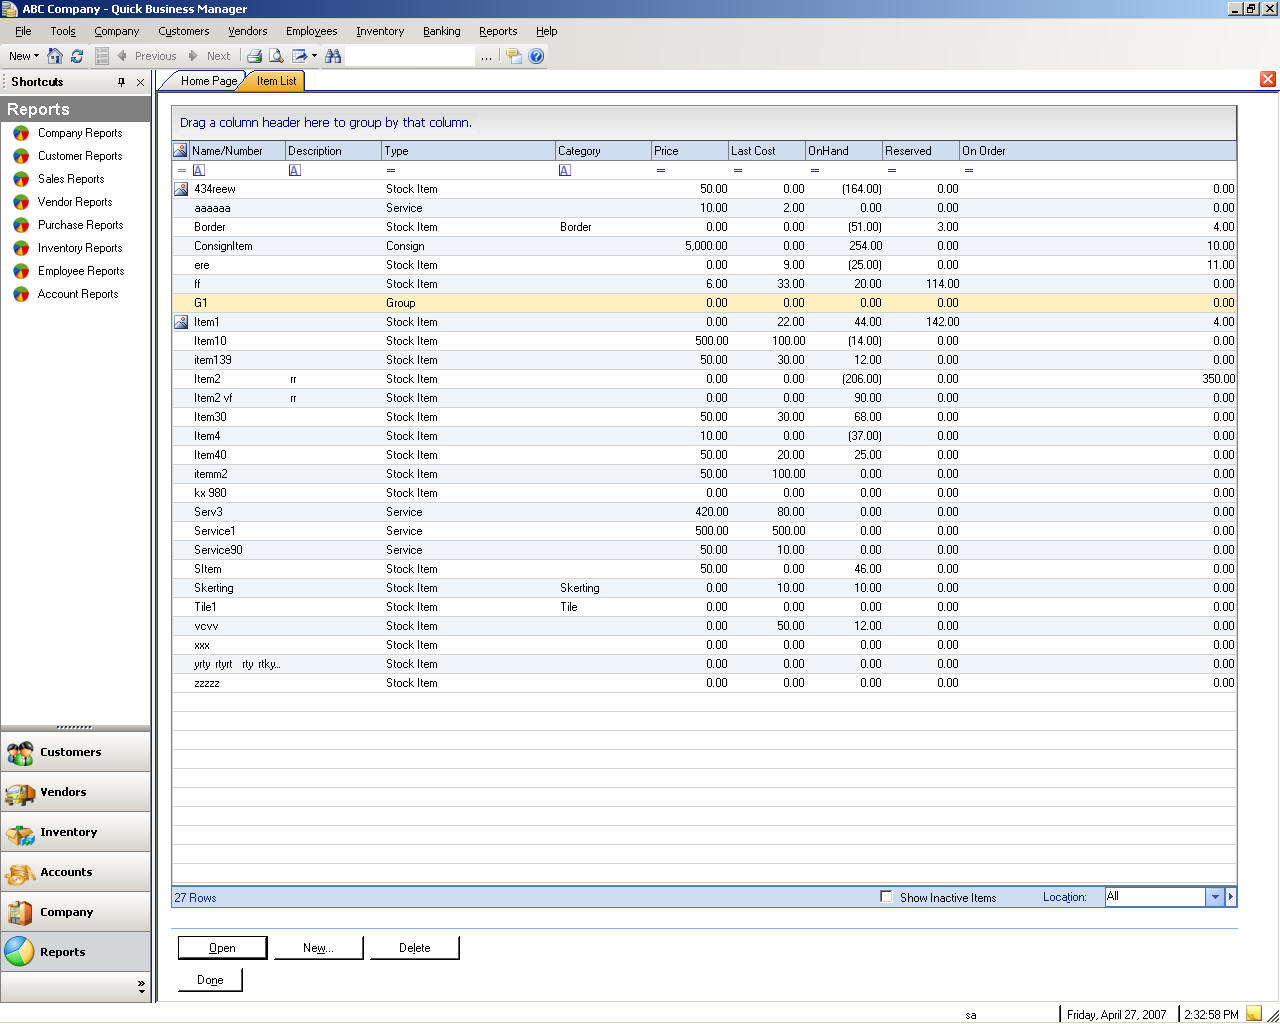
List of Products or Services
To create, edit, or delete a product or service, please go to the Items menu, and then select Item List.
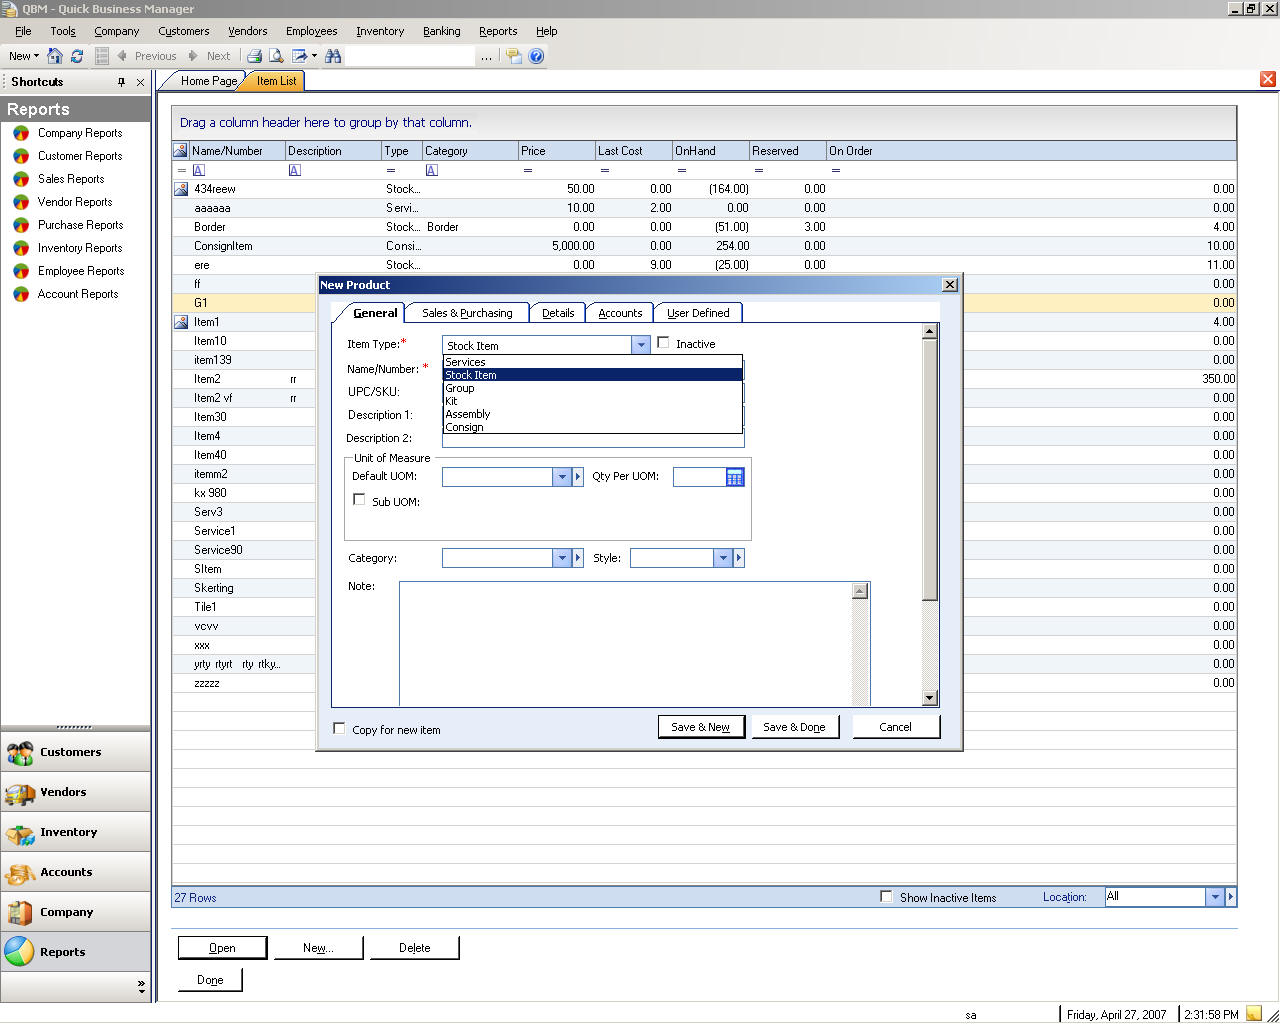
Item Setup
You setup items to track sales, cost, and stock status.
To setup a new item you must specify item name and type. An item name is unique name given to the item to identify the item in Quick Business Manager. An item type determines the type of item you sell or purchase.
|
Item Type |
Description |
|
Stock or Inventory-Part |
A stock item is a tangible item you keep in inventory for sell or purchase. |
|
Service Item |
Services that you charge customer or purchase, such labor charge, and contracting charges and other fees. |
|
Assembly Item |
An item is an assembled item if you build the item from several components and you want to track that assembled item. For example, a computer is an assembled item with several components, including a case, a motherboard, a processor, a CD Rom drive, hard drive, and so on. |
|
Kit Item |
A kit item is a group of items that are packaged and sold together. For example, you may want to sell a camera with batteries and film. |
|
Group Item |
Group item makes it easy to enter all of the items in the group at once in a transaction. |
Entering other information is optional.
|
Option |
Description |
|
Description |
Specify item description up to 256 characters. |
|
Category |
Category lets you group and classify items. For example, you can group and classify all types of watches you sell under category Watch. |
|
Unit of Measure |
The unit you use to sell or purchase the item such as box, pounds, kilograms, or hour. |
|
Subitem |
Sub items let you create a hierarchy of items so it will be convenient for you to track items. |
|
Model |
You may purchase an item with two different models and you want to track them separately. For example, an HP printer may have many models. |
|
Brands |
A brand specifies a trademark. |
|
Manufacturer |
A manufacturer can be a company or a person whom you purchase the item from. |
|
Size |
Item size, for example 12 inches. |
|
Color |
Item color, for example black, white, or green. |
|
Weight |
Item weight, for example 10 pounds. |
|
Quantity per UM |
Quantity per unit specify the number of item in each unit of measure. For example, if the Unit of measure is box and it contains 12 item, you enter 12. |
|
Made In |
Specify the location where this item was made. |
|
Income Account |
This accounts tracks the total sales of the item. |
|
Asset Account |
This account tracks the value of item you sell or purchase. For example, if the item cost is $40, and you sell 3 of the items, this account is credited for $120. |
|
COGS |
Cost of Goods Sold (COGS) account tracks the cost of item you sell or purchase. For example, if the item cost is $40, and you sell 3 of the items, this account is debited for $120. |
|
Note |
Up to 32,000 character. |
Transferring Items
Items can be transferred to various stock areas from the source location.
To transfer item between locations
This dialog allows you to transfer or move items between two stores.
Example:
Suppose there are two stores, one is a merchandise shop and another is a warehouse, and you want to transfer an item from the warehouse, which has the particular item, into the shop, which does not hold the particular item. From the Source Store select the warehouse and from the Destination Store select the store you want the item to be transferred into. Click next to go to the next screen. Click Add button to add an item. Then type the quantity you want to transfer and press enter. To Add more items click Add.
When you are done adding items, click Save and Done.
.
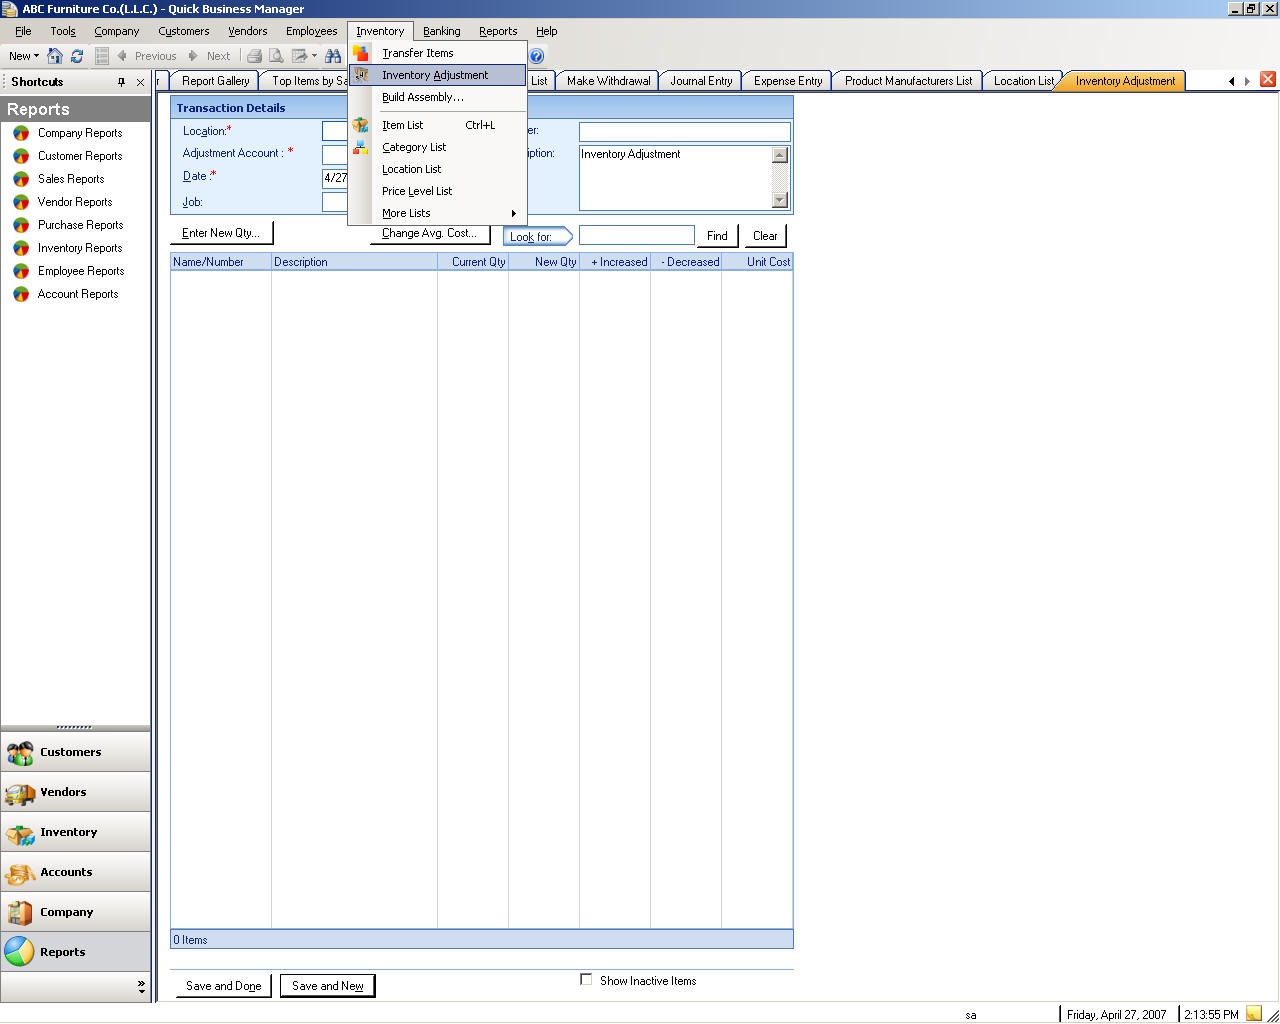
Adjustment of Items
Inventory adjustment lets you adjust the quantity on hand in your inventory from the specified store.
To view Inventory Adjustment
Building Assemblies
You use build assembly to build items that are of type assembly, such as a computer. A computer has many components and thus when you build a computer all its components, such memory cards, are deducted from stock on hand.
To build assembly, please go to the Items menu, and then select Build Assembly.
Category List
To create, edit, or delete a category, please go to the Items menu, and then select Category List.
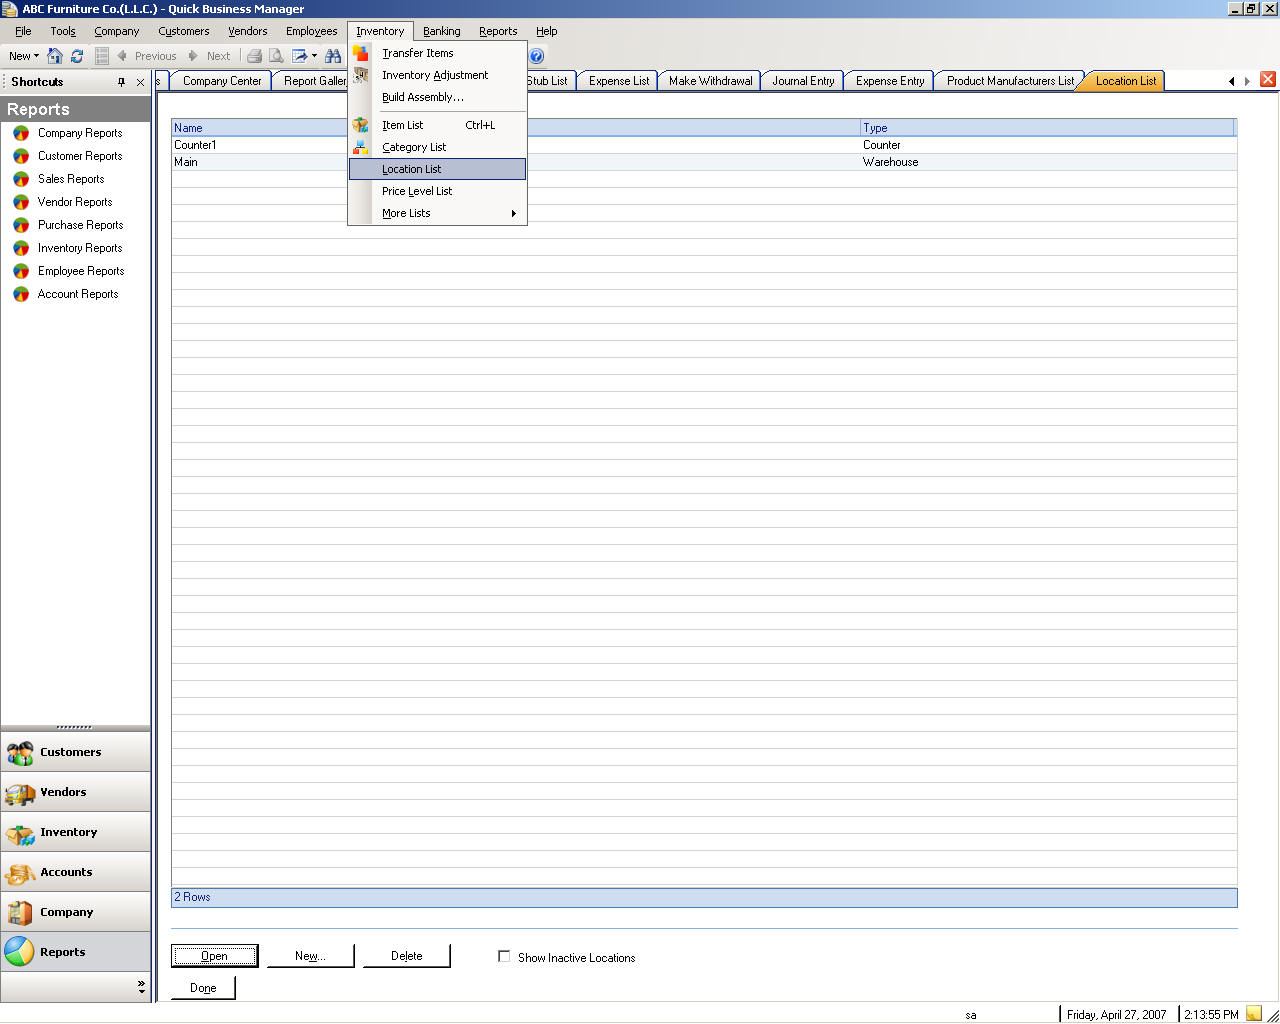
Location List
To create, edit, or delete a location, please go to the Items menu, and then select Location List.
Warehouse List
To create, edit, or delete a warehouse, please go to the Items menu, and then select Location List.
Store List
To create, edit, or delete a store, please go to the Items menu, and then select Location List.
Price Level List
To create, edit, or delete a price level, please go to the Items menu, and then select Price Level List.
Manufacturer List
To create, edit, or delete a manufacturer, please go to the Items menu, select More Lists, and then select Manufacturers.
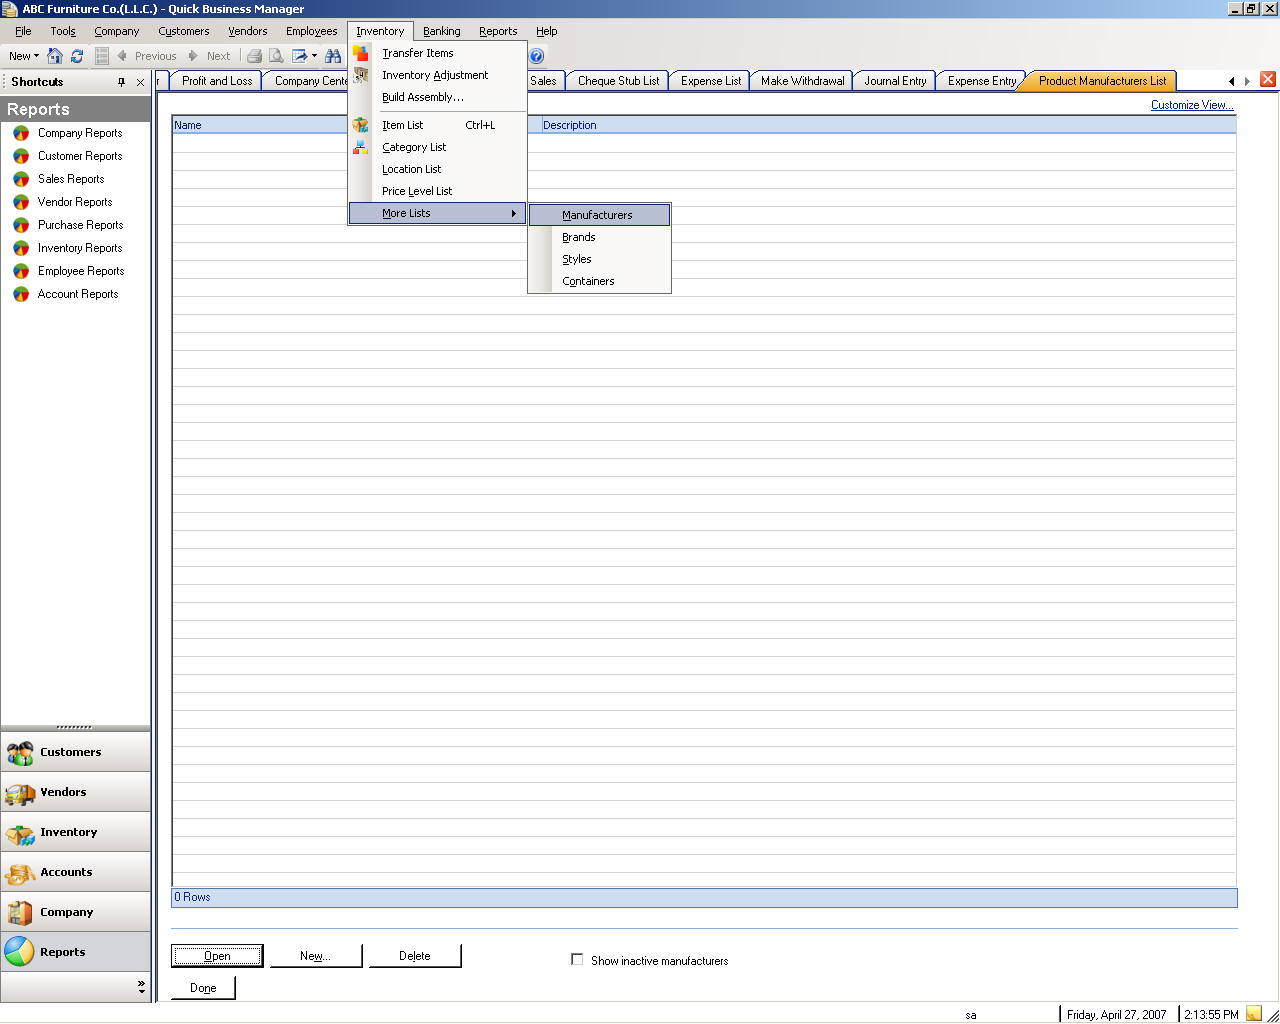
Brand List
To create, edit, or delete a brand, please go to the Items menu, select More Lists, and then select Brands.
Style List
To create, edit, or delete a style, please go to the Items menu, select More Lists, and then select Styles.
Container List
To create, edit, or delete a container, please go to the Items menu, select More Lists, and then select Containers.
Banking
Chart of Accounts
To create, edit, or delete an account or financial account, please go to the Banking menu, and then select Chart of Accounts.
Types of Accounts
|
Account Type |
Description |
|
Asset Accounts |
These accounts track what your company owns. |
|
Liabilities Accounts |
These accounts track what your company owes to other companies. |
|
Equity Accounts |
These accounts track owner's equity. |
|
Income Accounts |
Income accounts track the sources of your income. |
|
Expense Accounts |
Tracks what your company is spending. |
|
Bank |
Use bank account to track Bank Checking, and savings. Add one bank account for every account your company has at a bank. (You can also use this type for petty cash.) |
|
Accounts Receivable (A/R) |
Use this account to track transactions related to the customers that owe you money, including invoices, payments, deposits of payments, refunds, and credit memos. Most companies have only one A/R account.
|
|
Other Current Asset |
Use this account to track assets that are likely to be converted to cash or used up within one year, such as petty cash, or notes receivable due within a year.
|
|
Fixed Asset |
Use this account to track depreciable assets your company owns that are not likely to be converted into cash within a year, such as equipment or furniture. |
|
Accounts Payable (A/P) |
Use this account to track transactions related to money you owe, including bills, bill payments, and any credit you have with vendors. |
|
Credit Card |
Use this account to track credit card purchases, bills, and payments. |
|
Current Liability |
Use this account to track liabilities that are scheduled to be paid within one year, such as deferred salaries, and short-term loans. |
|
Long-Term Liability |
Use this account to track liabilities such as loans or mortgages scheduled to be paid over periods longer than one year. |
|
Equity |
Use this account to track owner's equity, including capital investment, drawings, and retained earnings. |
|
Income |
Use this account to track the main source of money coming into your company. |
|
Other Income |
Use this account to track money received for something other than normal business operations, such as interest income. |
|
Expense |
Use this account to track money that is leaving your company. |
|
Other Expenses |
Use this account to track money spent on something other than normal business operations. |
|
Cost of Goods Sold (COGS) |
Use this account to track the cost of goods and materials held in inventory and then sold. |
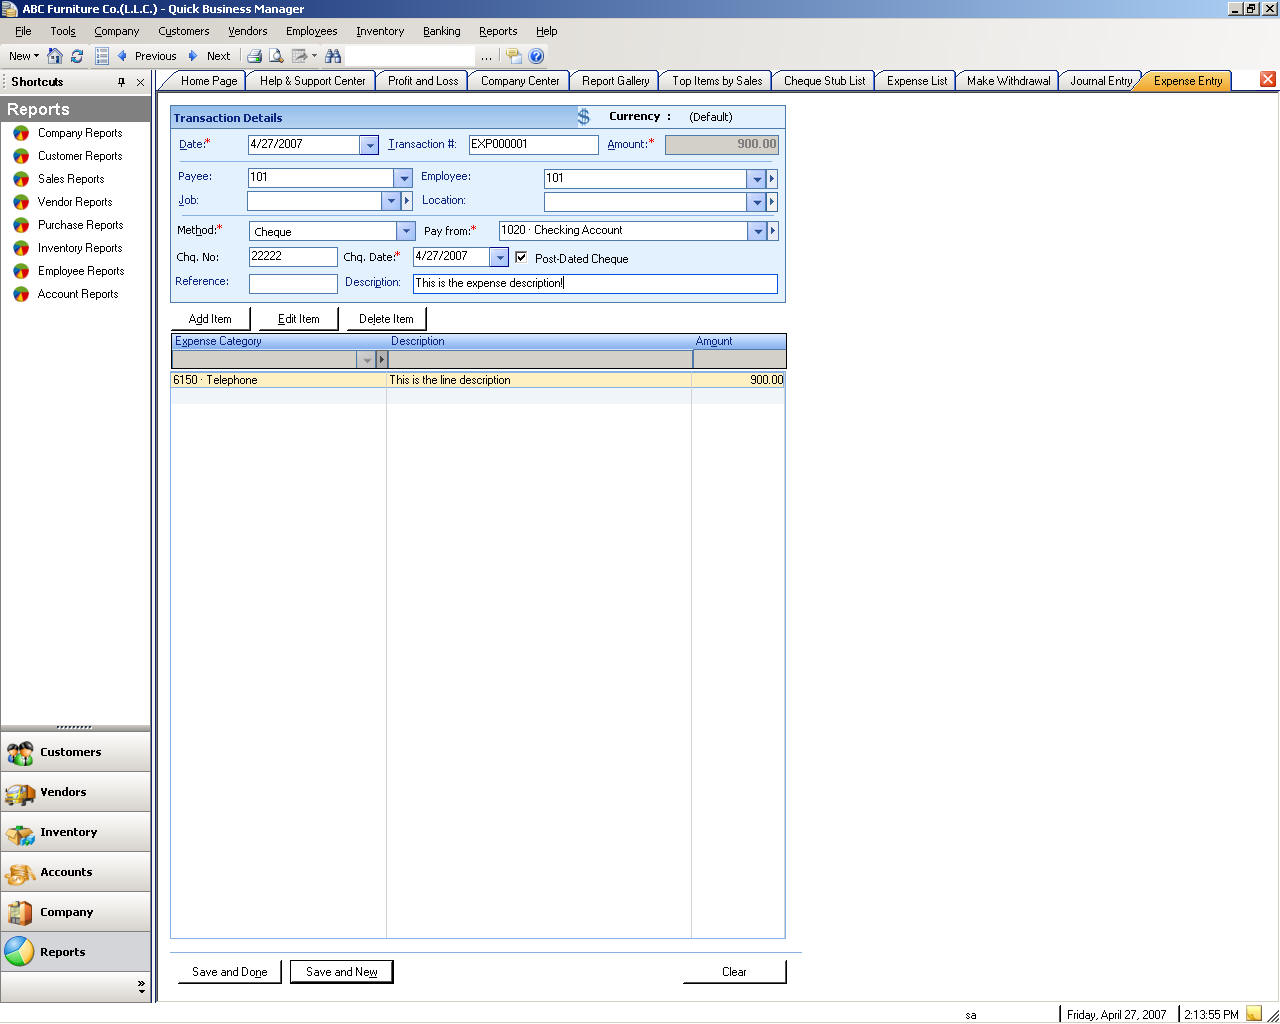
Entering Expenses
To enter expenses, please go to the Banking menu and then select Enter Expenses.
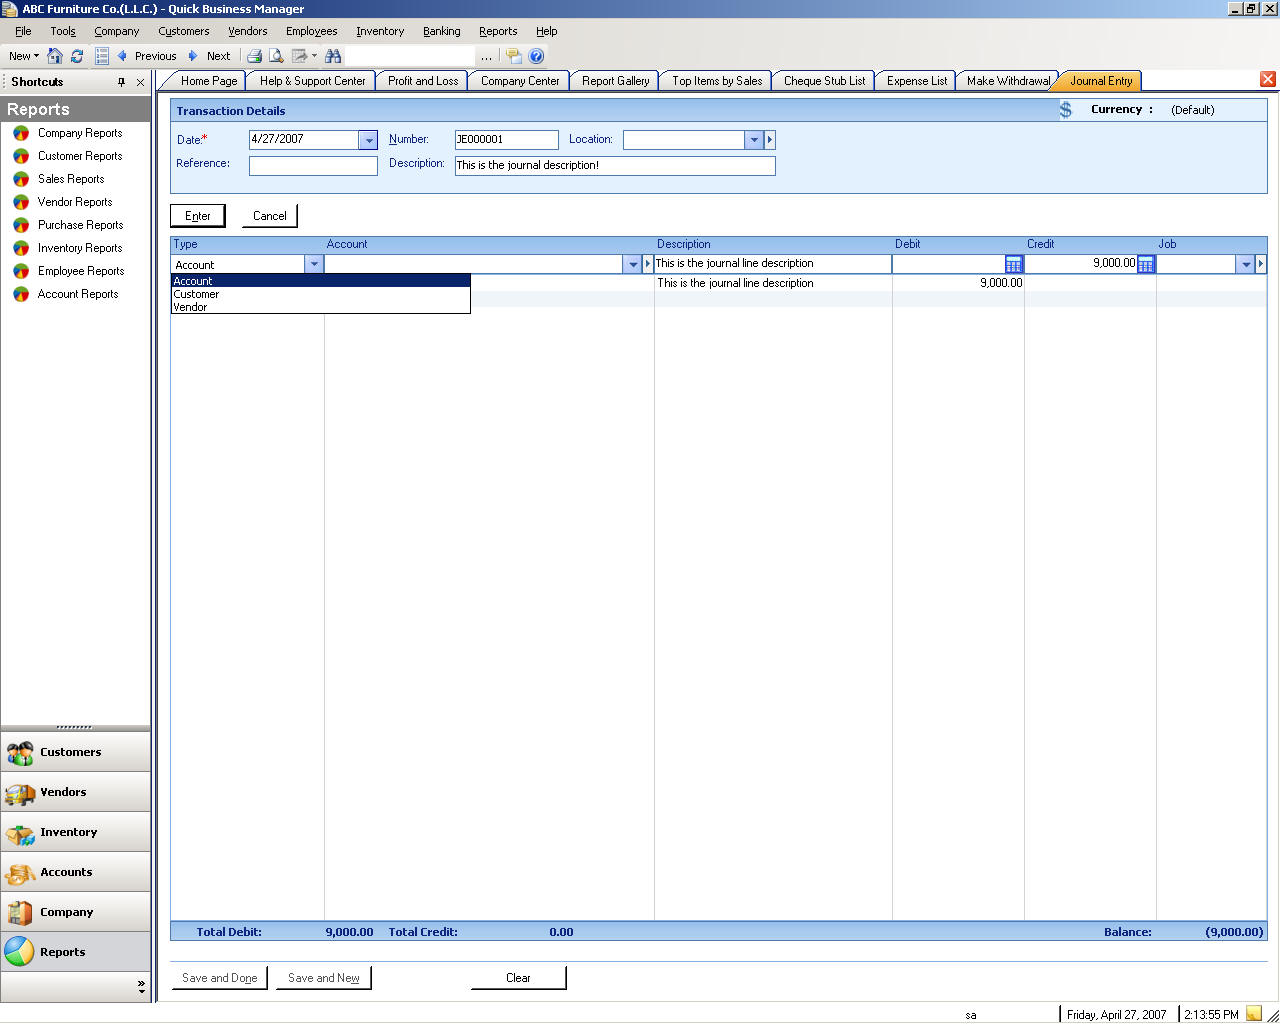
Creating Journal Entries
To make journal entries, please go to the Banking menu and then select Make Journal Entry.
Depositing Money
To deposit money into your bank accounts, please go to the Banking menu and then select Make Deposits.
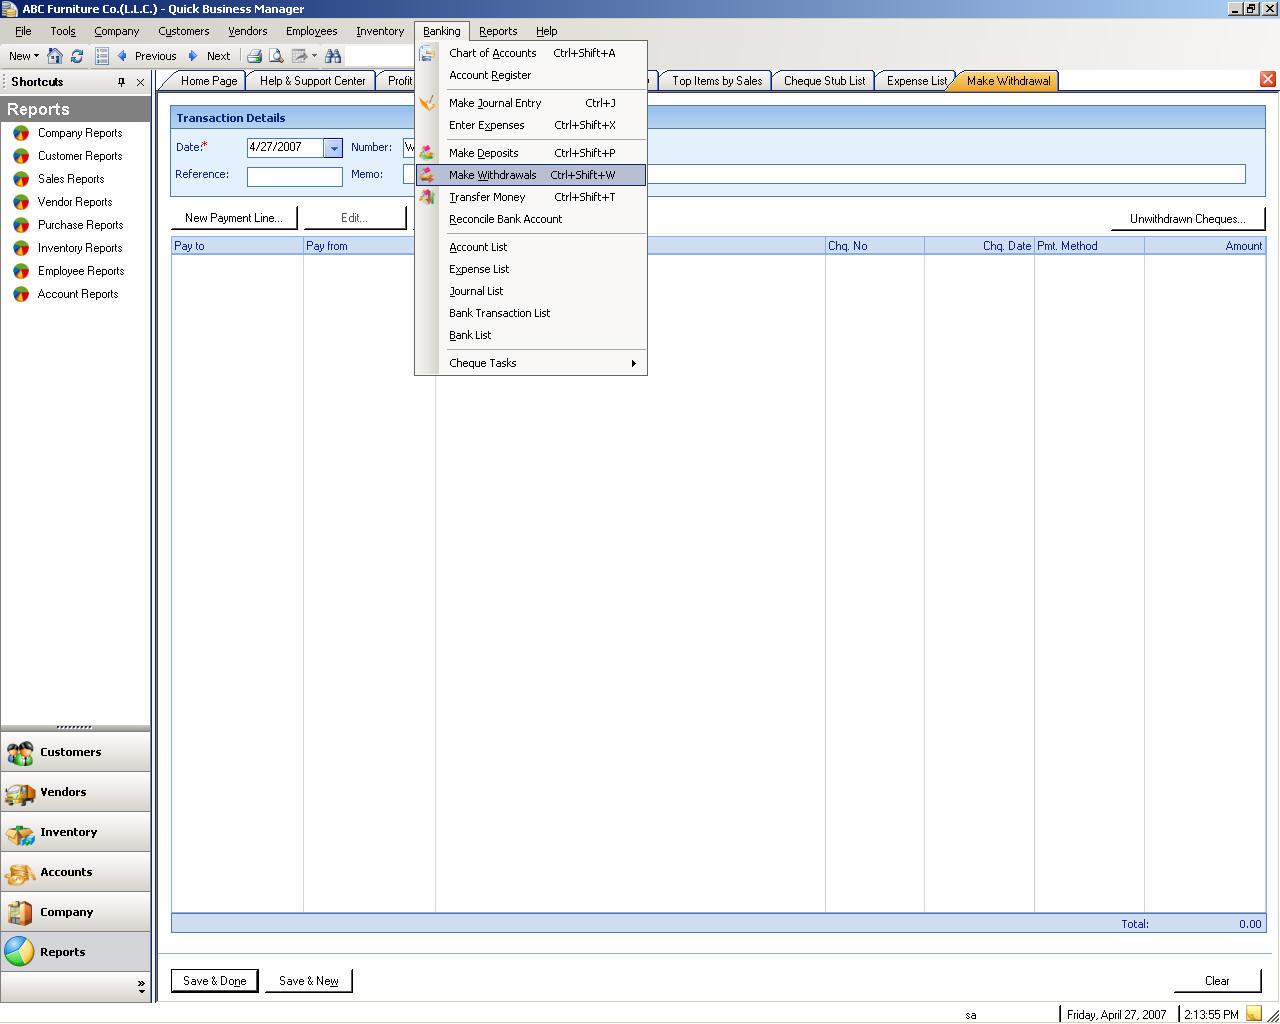
Withdrawing Money
To withdraw money from your bank accounts, please go to the Banking menu and then select Make Withdrawals.
Transferring Money
To transfer money between your bank accounts, please go to the Banking menu and then select Transfer Money.
Reconciling Bank Accounts
To reconcile your bank accounts, please go to the Banking menu, and then select Reconcile Bank Account.
Account List
To create, edit, or delete an account or financial account, please go to the Banking menu, and then select Account List.
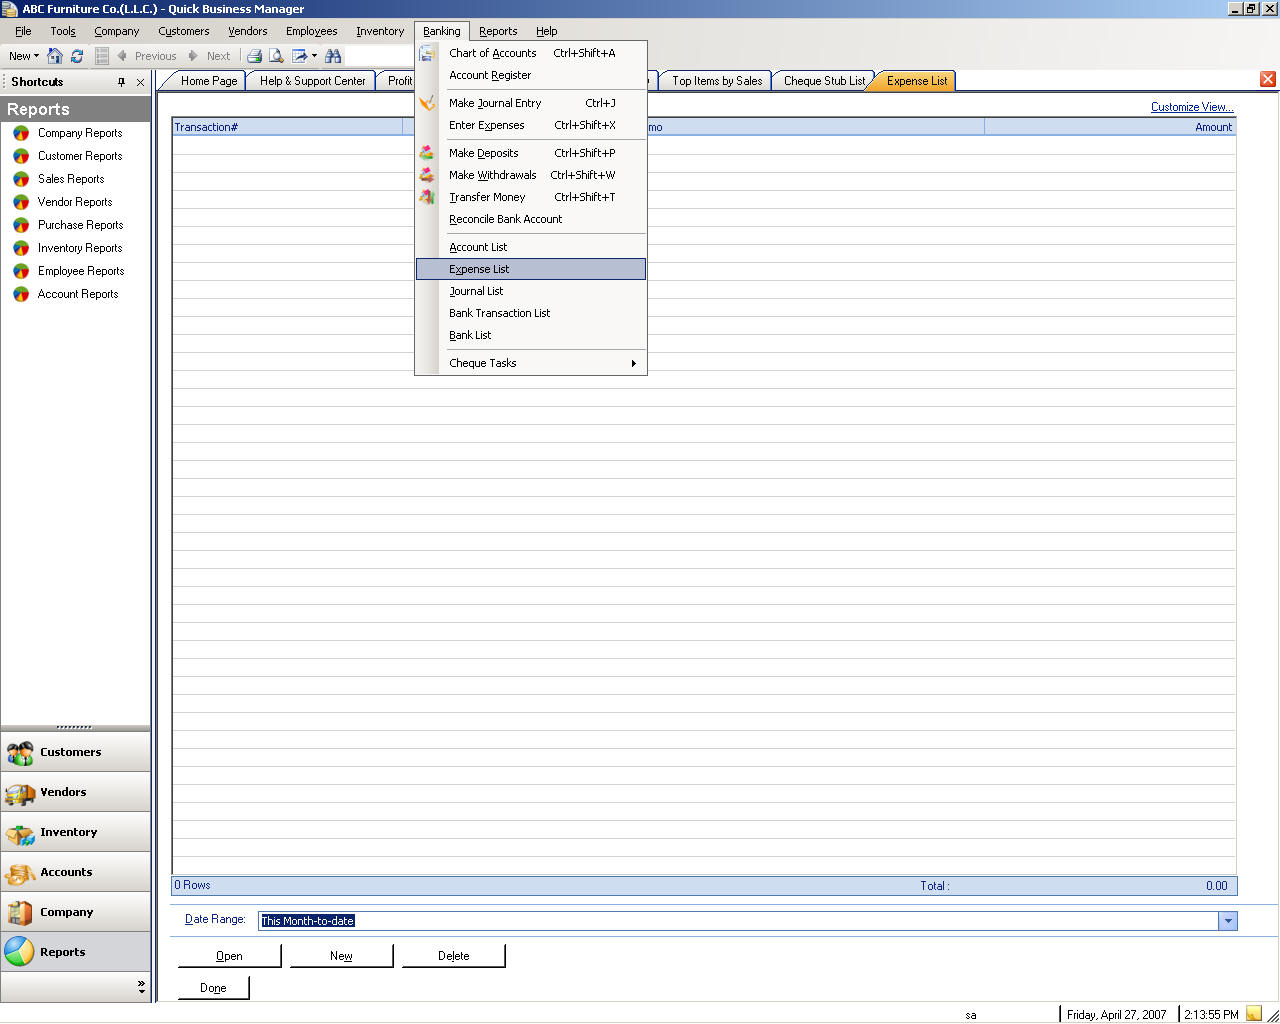
Expense List
To create, edit, or delete an expense, please go to the Banking menu, and then select Expense List.
Journal List
To create, edit, or delete a journal, please go to the Banking menu, and then select Journal List.
Bank Transaction List
To view, or delete a bank transaction, please go to the Banking menu, and then select Bank Transaction List.
Bank List
To create, edit, or delete a bank, please go to the Banking menu, and then select Bank List.
Registering Chequebooks
To register a chequebook, please go to the Banking menu, then select Cheque Tasks, and then select Register Chequebooks.
Voiding Paid Cheques
To void a paid cheque, please go to the Banking menu, then select Cheque Tasks, and then select Void Paid Cheques.
Bouncing Received Cheques
You may bounce a cheque when a cheque is returned from the bank because of insufficient fund or other reasons.
To bounce a received cheque, please go to the Banking menu, then select Cheque Tasks, and then select Bounce Received Cheques.
Printing Cheques
To print a cheque, please go to the Banking menu, then select Cheque Tasks, and then select Print Cheques.
Chequebook List
To create, edit, or delete a chequebook, please go to the Banking menu, and then select Chequebook List.
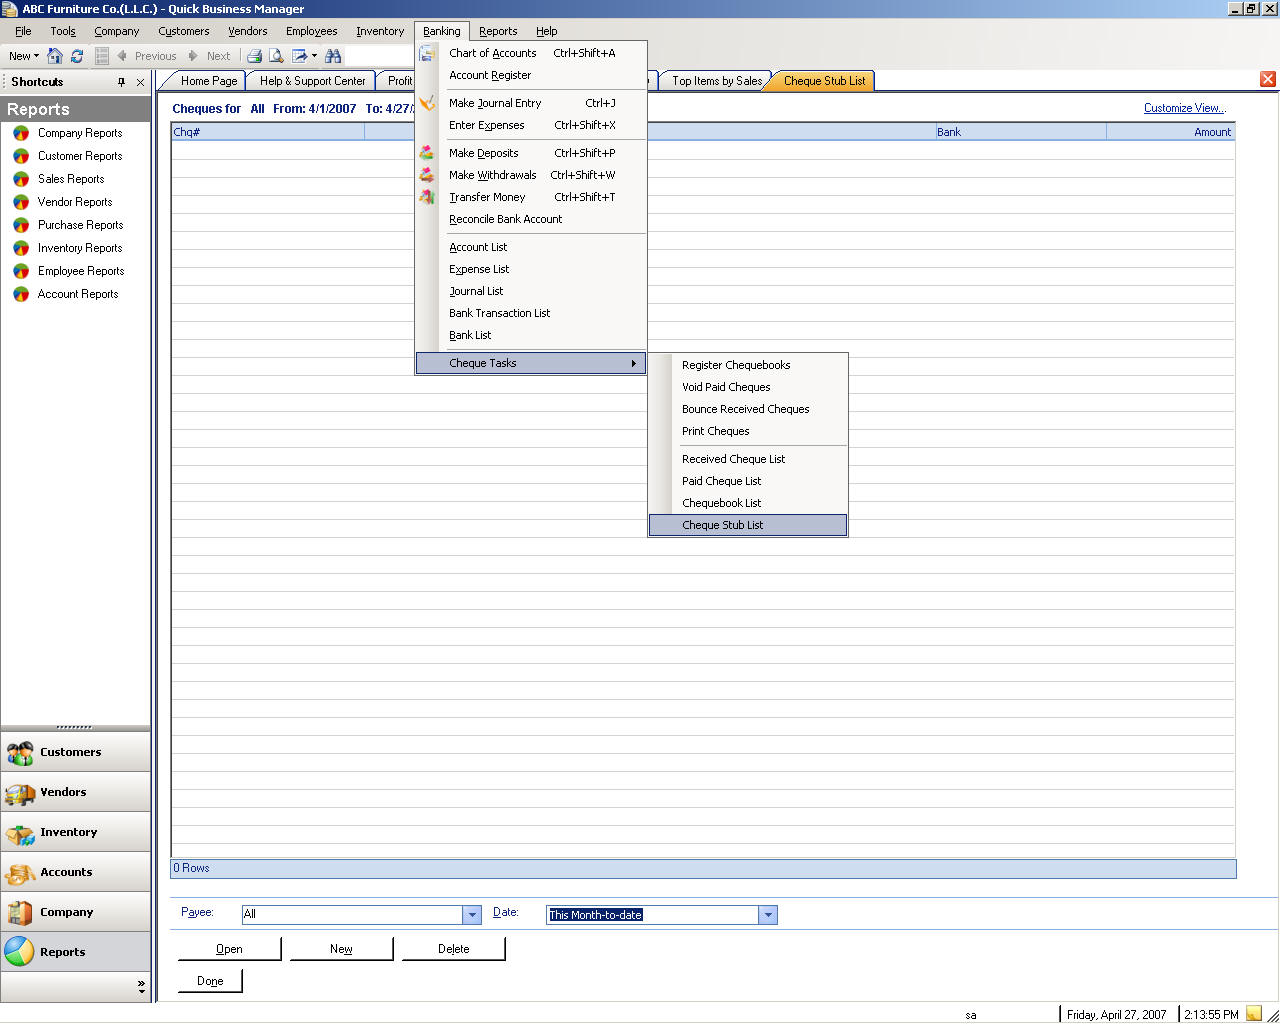
Cheque Stub List
A cheque stub is a cheque that was printed using Print Cheques.
To create, edit, or delete a cheque stub, please go to the Banking menu, and then select Cheque Stub List.
Reports
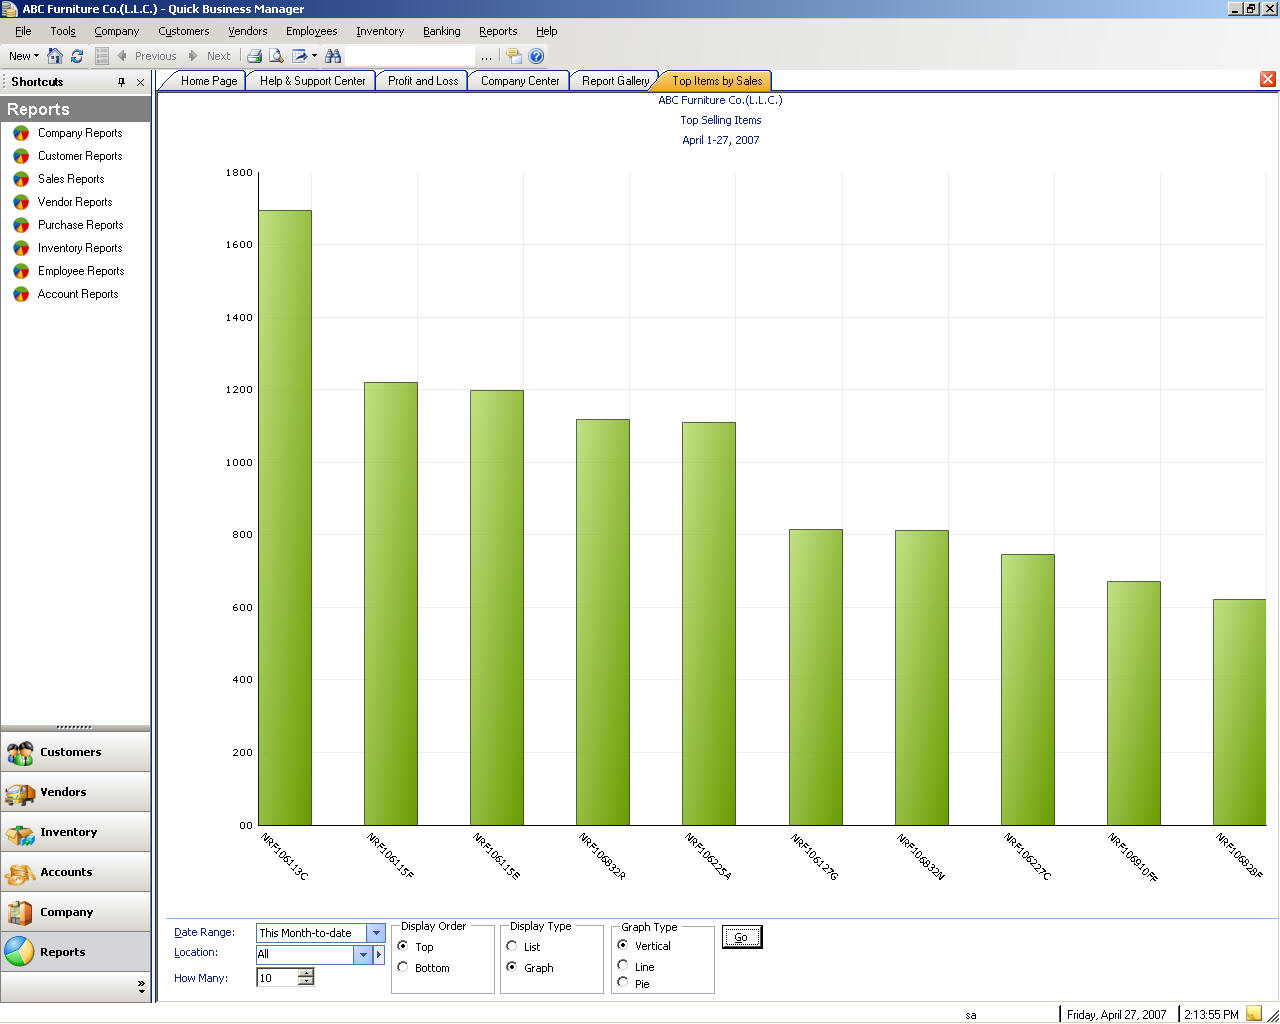
Reports can be simple lists such as customer phone list or they can be complex documents that include calculated information and historical data such as sales by customer report.
In Quick Business Manager you have the ability to preview report, export to Excel for further analysis, export to other file formats such as Word, PDF, XML, or HTML. A previewed report shows what will be printed on the paper. If the report is not in previewed window, you can adjust column width or hide some column you do not want to be printed.
You can filter a report before previewing or exporting to other applications such as excel. When you select a particular report, a pre-previewed report is displayed, where you can filter. You can filter a report based on dates and other criteria. For example, you can filter Sale by Customer report based on date and/or customer name.
There are over 120 predefined reports available in Quick Business Manager. These reports are grouped as follows:
Printing
Printing documents, lists, or reports is done using print templates and the printer. If you would like to print a document, please select Print from the File menu or click on the printer icon above the specified document. The printer settings dialog appears and lets you specify how you want to print the document. For example, to modify the print template, please click on the Details button next to the print template and change its settings, or if you want to print the gridlines of a report in different colors, click print gridlines and set its color.
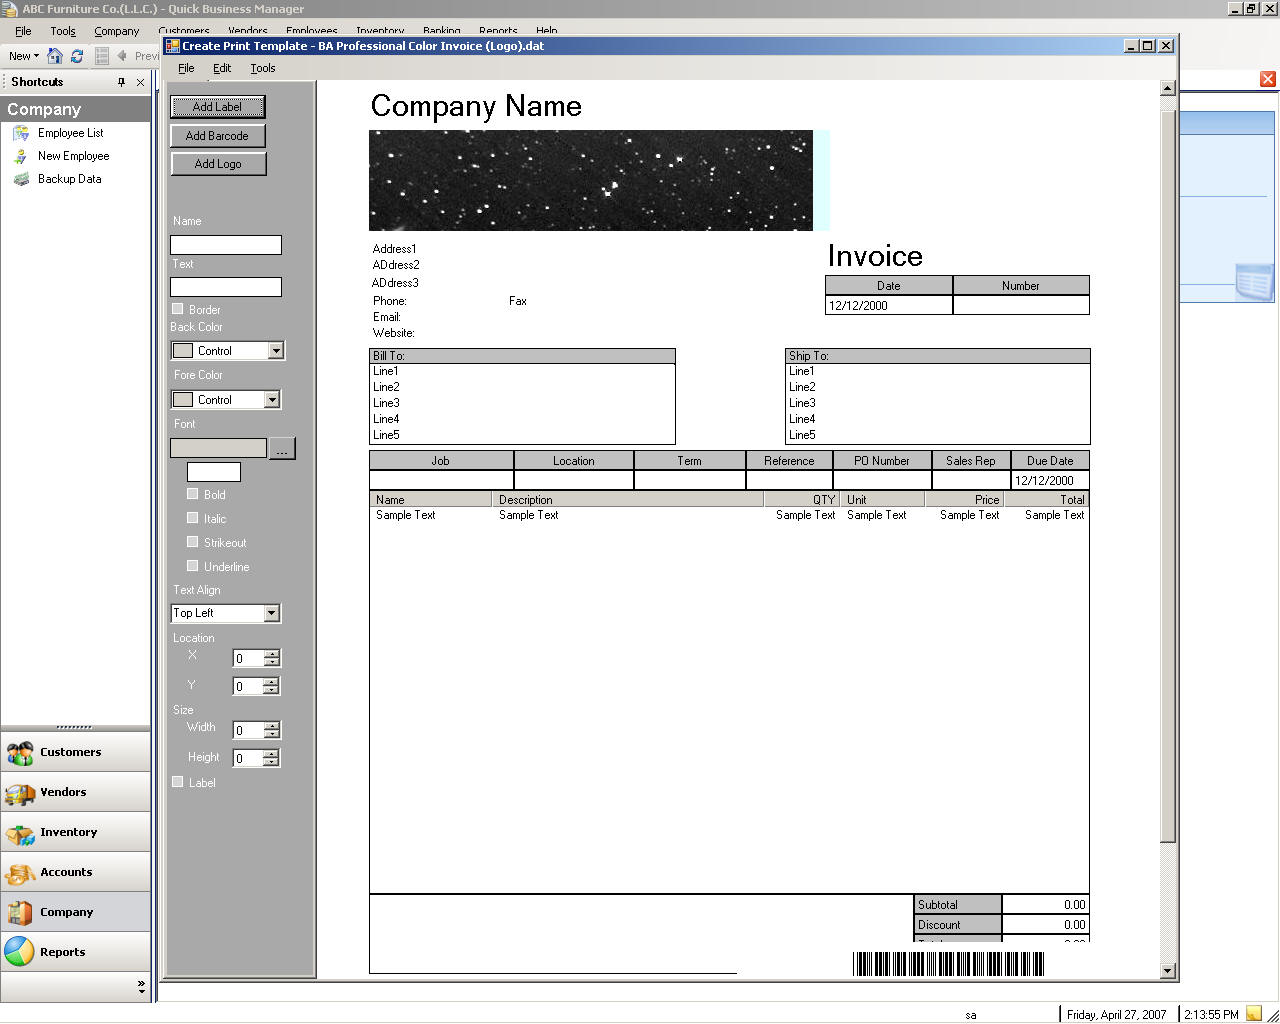
Print Template
A print template allows for a flexible customization of the print layout. For example, you can change the font, or the color of the print layout.
There are many print templates loaded into your database, however if you would like to load a template please select Load Print Templates from the File menu.
To design a print template, select Design Print Templates from the File menu and then load the specified template. After that, select the specified template from “PrintTemplates” folder. After loading the specified print template, design it and then save it with a different name or the same name and then exit the template designer. Then to load the designed template, select the file, set “Overwrite existing templates” checkbox and then load it. The specified template is loaded into your database, and you can use this template by selecting it from the template settings.
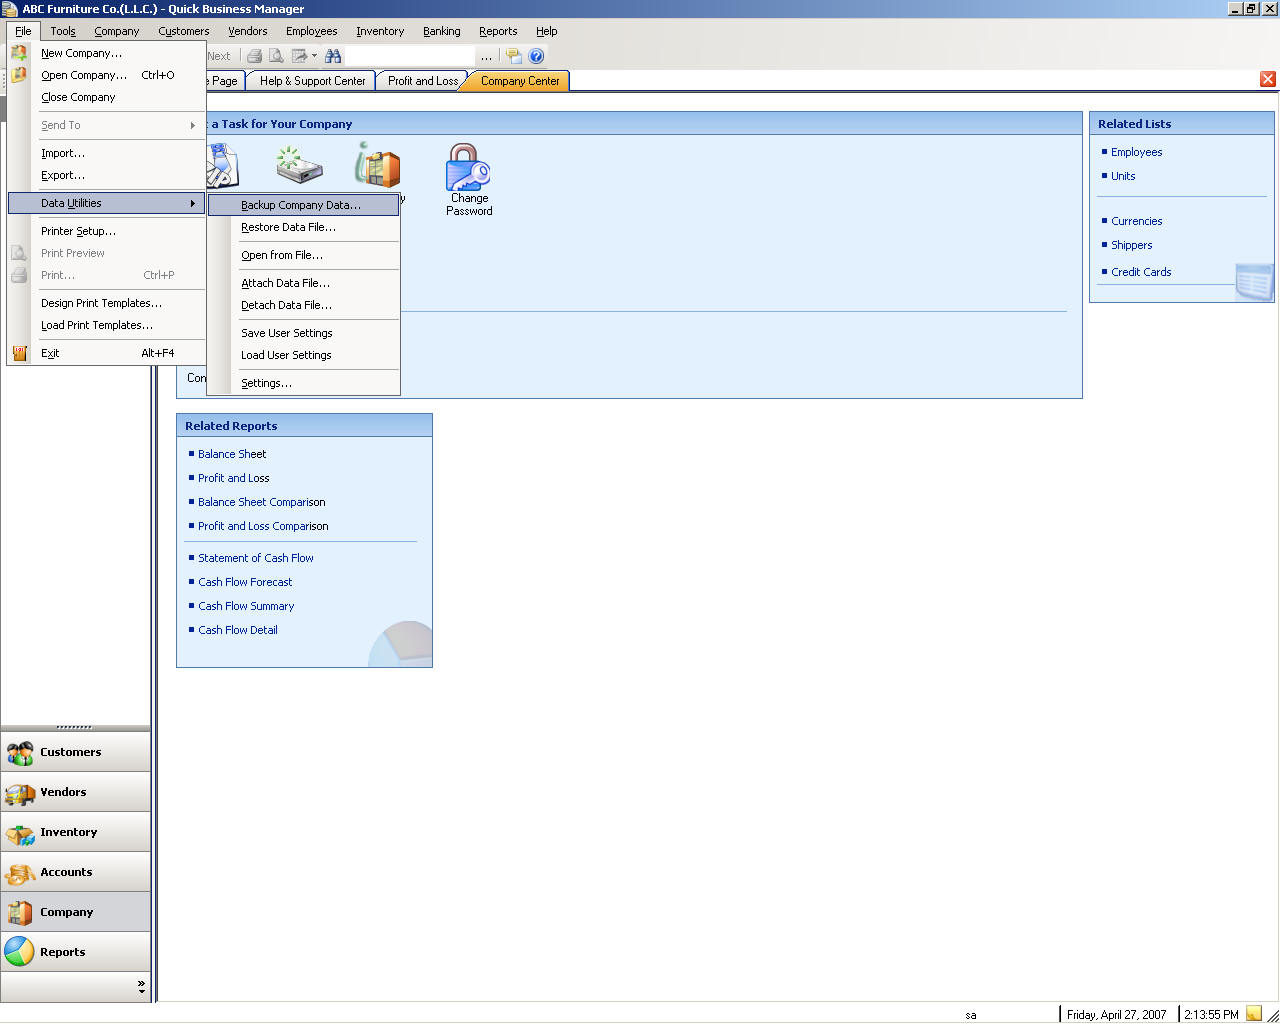
Backing Up Your Company Data
Backup your company database very often and early. Make sure you backup database to a different disk and make sure the backup moves to a completely separate place (ideally off-site) to be sure that it is safe. The reason is that in case of fire to your computer, your backup data will be safe and secure.
To backup your current database, please go to the File menu, then select Data Utilities, and then select Backup Company Data.
Restoring Your Company Data
Restoring is getting the backup data back.
To restore a company database, please go to the File menu, then select Data Utilities, and then select Restore Data File.
Exporting Reports or Lists
You can send a report or a list to Microsoft Excel, and Microsoft Word, or save it and view it in PDF format, Web Page format, XML format, or a plain text.

Importing
To import a data to an XML file, please go to the File menu, and the select Import.
Exporting
To export a data from an XML file, please go to the File menu, and the select Export.
Opening a Company from a File
You open a company from a file only if the file is not being in use by an existing database in the SQL Server.
To open a company from a file, please go to the File menu, then select Data Utilities, and then select Open from File.
Attaching a Database
To attach (add) a database, please go to the File menu, then select Data Utilities, and then select Attach Data File.
Detaching a Database
To detach (remove) a database, please go to the File menu, then select Data Utilities, and then select Detach Data File.
Saving User Settings
The user settings, such as default accounts or locations, are saved in an XML file on the user’s computer. However the settings can be saved in the current database to prevent from losing the settings.
To save the user settings, please go to the File menu, then select Data Utilities, and then select Save User Settings.
Loading User Settings
If you have previously saved the user settings into the database, you can load the settings to overwrite the current settings.
To load the user settings, please go to the File menu, then select Data Utilities, and then select Load User Settings.
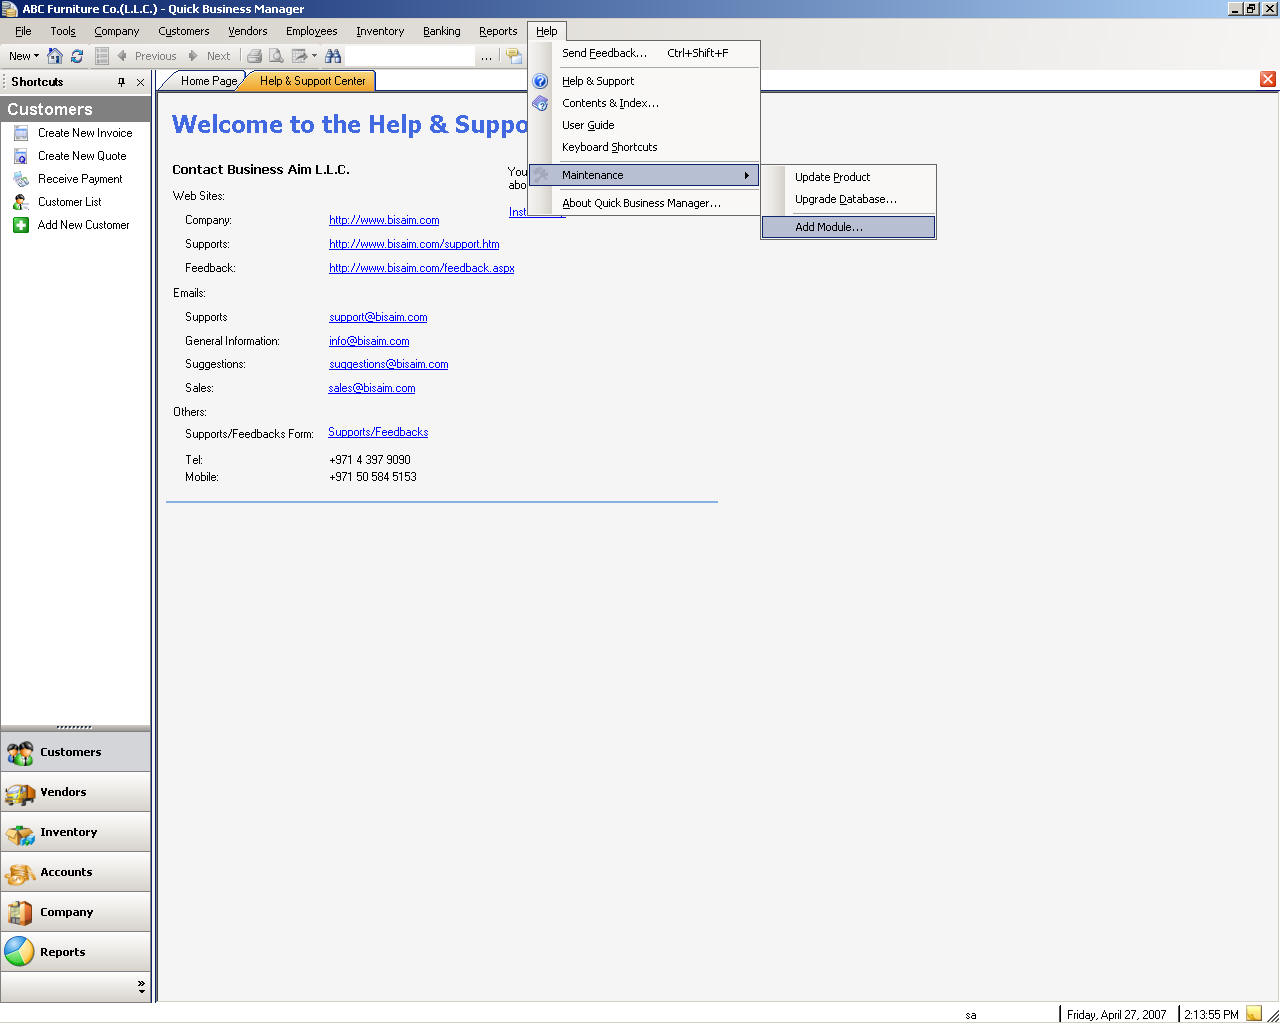
Other Modules
You can add an extra module that is created for a specific use. For example, if you are a visa company, you may want to add visa module. Some of the existing modules include:
Module for Visa
Module for companies that sell tile
Module that reduces quantity by delivery note
Consignment module, for companies that sell consigned items
QBM Point of Sales (POS)
QBM POS is a stand alone program, which works directly with the main program.
Window Navigation Keyboard
|
Navigation |
Keyboard Shortcut |
|
Move to next field |
TAB |
|
Move to previous field |
SHIFT + TAB |
|
Open a company |
CTRL + O |
|
Find transactions |
CTRL + F |
|
Calculator |
CTRL + K |
|
Company information |
CTRL + SHIFT + F |
|
Create invoices |
CTRL + I |
|
Receive payments |
CTRL + R |
|
Customer list |
CTRL + SHIFT + U |
|
Vendor list |
CTRL + SHIFT + V |
|
Make journal entry |
CTRL + J |
|
Sending Feedbacks |
CTRL + SHIFT + F |
|
Help about current window |
F1 |
|
|
ALT + F4 |
Document Keyboard Shortcuts
|
Navigation |
Keyboard Shortcut |
|
|
CTRL + P |
|
Delete an item |
Delete key |
|
Insert an item |
Insert key |
|
Edit an item |
F2 |
|
Save and Done |
CTRL + 1 |
|
Save and New |
CTRL + 2 |
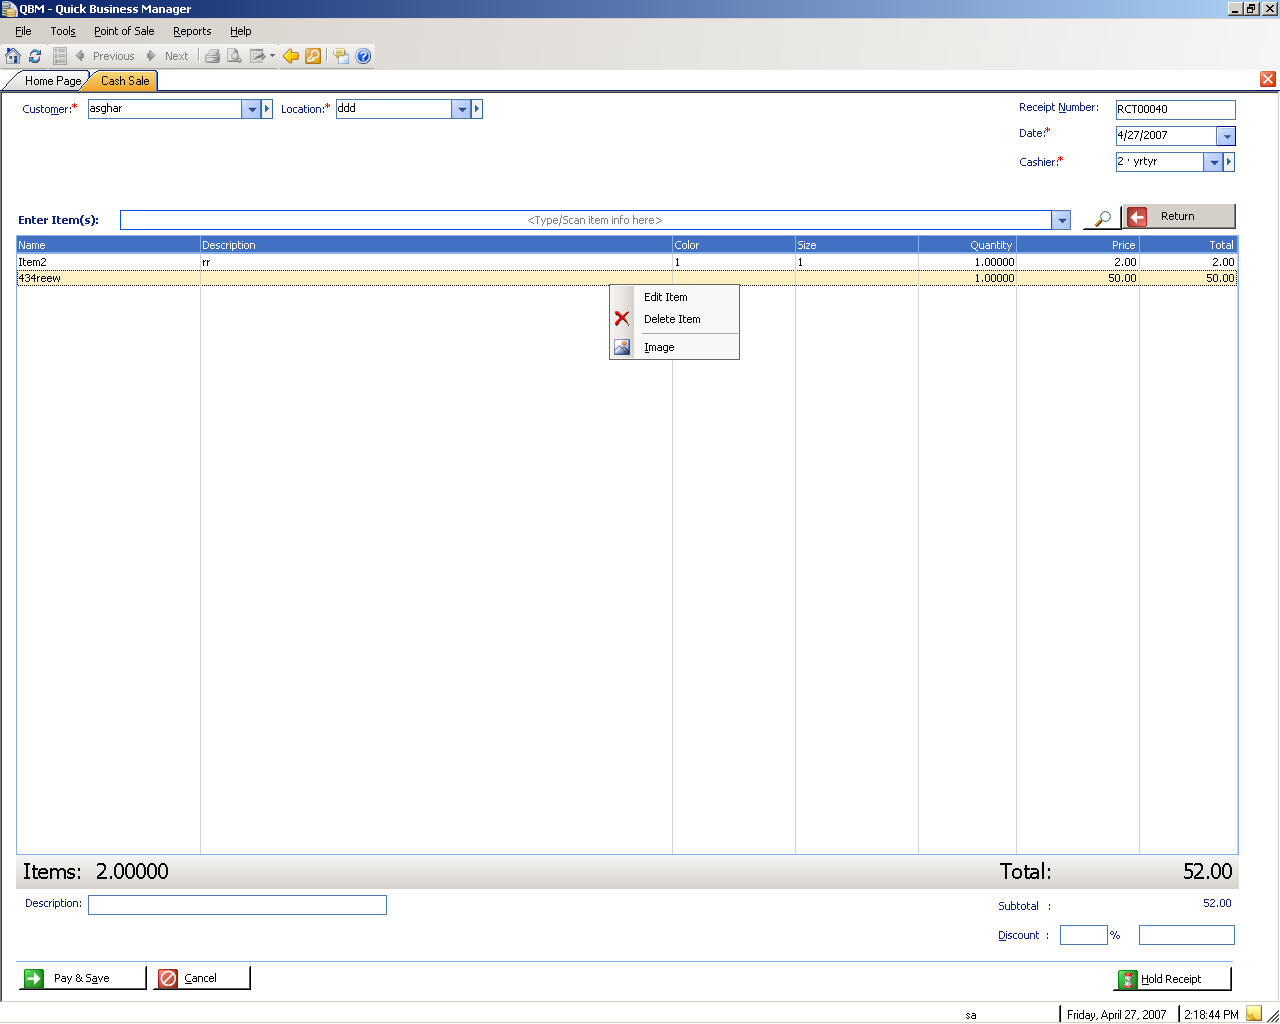
Point of Sales (POS) Keyboard Shortcuts
|
Navigation |
Keyboard Shortcut |
|
Show item list |
F3 |
|
Go to item scan |
F4 |
|
Pay and Save |
F5 |
|
Show item image |
F6 |
|
Delete item |
Delete key |
|
Edit item |
F2 |
|
Set discount |
F7 |
|
Counter summary |
F10 |
|
Receive items |
CTRL + B |
|
Receive payments |
CTRL + R |
|
Customer list |
CTRL + Shift + U |
|
Calculator |
CTRL + K |
|
Create/View notes |
CTRL + Shit + N |
|
Send feedback |
CTRL + Shift + F |
|
Open company |
CTRL + O |
|
|
CTRL + P |
|
Exit |
ALT + F4 |
Sending Feedback
We appreciate your comments and feedbacks. Please send your feedbacks by going to the Help menu, and then select Send Feedback.
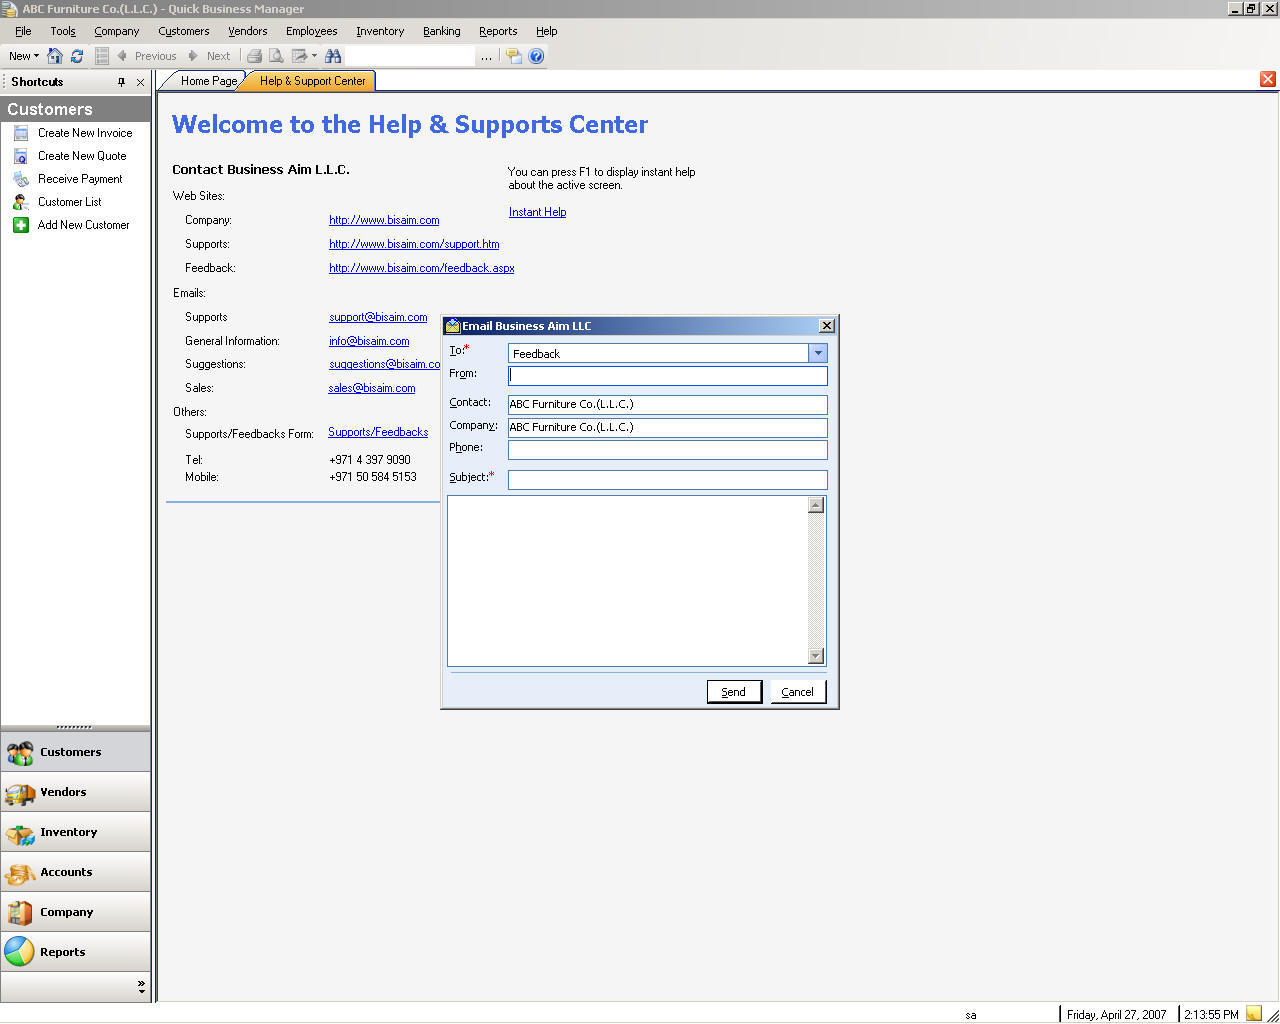
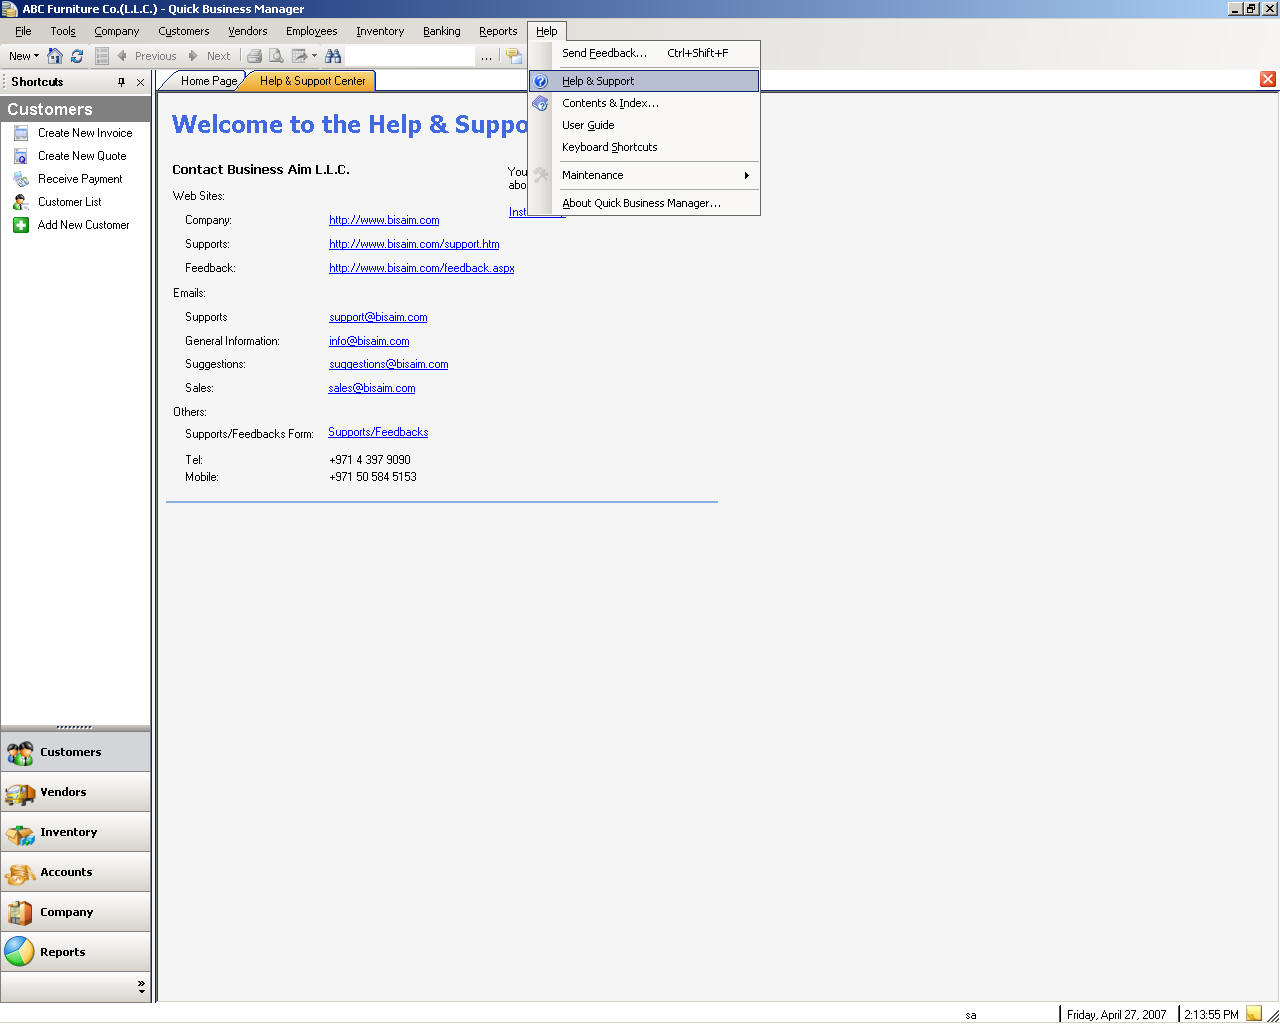
Help and Support
Please feel free to contact us if you have any question by going to the Help menu and then select Help & Support.